Sunday, 29 August 2010

Why won't anyone believe me?!

Bacon cookies really work. Neither my mum nor my brother believed me, so I had to bake them a batch. It's the same recipe as last time, except without walnuts and I used dark brown sugar instead of caster sugar.

Here are the cookies ready for the oven.
And ready to eat!
Both my mum and my brother were sceptical at first. They tried the cookies and said they didn't like them. But they continued eating the cookie and finished it. And then went for another. And another. And eventually conceded that it really genuinely works. What we learned from this time around though is that the walnuts actually do add something, even if I didn't realise it at first; you really notice the absence.

Wednesday, 25 August 2010

Verdict: Spiced honey, sultana and nut roll

Honestly? A bit of a disappointment, really. It's tremendously pretty, but the taste just doesn't quite live up to the looks. I thought it somewhat bland - actually, I thought it needed more of everything: more honey, more sultanas, more nuts and definitely more spice! But being a bit more specific, I think it really needed a bit more sweetness, so honey would be the first thing I'd increase. Or rather, I'd add some brown sugar on top of the honey. The sultanas worked really well and I think having a bit more would definitely be an improvement - the same goes for the nuts, but they were closer to the right amount. And the spices were barely present - I needed to add a heck of a lot more. Overall, it was a disappointment, but it shows a lot of promise. A few minor tweaks to the recipe, and this could be excellent. Maybe some mixed peel and possibly a little ground ginger or cloves too would benefit matters, but really it's just the overall balance of flavours that needs tuning.
This rather arty photo is courtesy of Kenny.
And if you'd like to know why Kenny's photos always look so much better than the ones I take, this gives you an idea of the lengths he goes to when he takes photos. This time around, it was a relatively simple shot; usually he also goes to the hassle of getting a couple of table lamps positioned to improve the lighting!

Roll over Beethoven? No, there are no berries here...

It's been a while since the last entry, but I've been busy. I felt like baking today though, which seemed like a good reason to bake! I got the idea for this from a recipe for Beigli from The Baker, but it bears only a fairly small resemblence really. This is just a sweetened bread turned into a sultana, nut, honey and spice roll. It's not a massively adventurous recipe, but I think it ought to work nicely.

Spiced honey, sultana and nut roll
Ingredients
  • 1/2 sachet Fast-action yeast
  • 310g Strong flour
  • 110g Unsalted butter
  • 65g Caster sugar
  • 1 Egg, beaten
  • 90ml Milk
  • 45g Walnuts*
  • 40g Hazelnuts*
  • 50g Almonds*
  • 185g Sultanas
  • 3tsp Cinnamon
  • 1 1/2tsp Nutmeg
  • 110g Honey
Method
  1. Mix the yeast with the flour and rub in the butter until it resembles coarse breadcrumbs.
  2. Mix in the sugar, then stir in the milk and egg and combine to form a dough.
  3. Knead for 10 minutes, then allow to rise, covered, until doubled in size.
  4. Knock the dough back and knead for 5 minutes. Flatten into a rectangle a little bit larger than A4 size.
  5. Sprinkle the sultanas, chopped nuts and spices over the dough, then drizzle the honey over the top.
  6. Roll the dough up widthways and place on a greased baking tray.
  7. Cover with a damp teatowel and leave to prove until doubled in size.
  8. Prick the top with a fork in several places and bake at 200C for 35-40 minutes.
  9. Remove to a wire rack to cool.
*These quantities might possibly just have been what I had left in my cupboard...

Here it is at the end of step 5.After rolling (end of step 6).After proving (end of step 7). It's not risen very much!But out of the oven, it's looking rather a lot better. Some of the honey leaked a bit though.

Saturday, 31 July 2010

Verdict: Apple and blackberry flan

Sadly, it looks better than it tastes. On the plus side though, that's more because it looks amazing, rather than it not tasting good. And it does taste good... but I don't think it's better than (or even quite as good as) a tarte tatin. The sweetness is absolutely perfect - and there's a lovely gradation from the sweet pastry through the medium apple to the sharp blackberries. There's a nice soft texture to the apples; the texture of the blackberries is not so nice (but exactly as you'd expect from blackberries). But the problem I have with this one is that there's something missing in terms of flavour - it's all perfectly pleasant, but it needs just that little bit more zing. Perhaps it needs some citrus - maybe some orange zest or a squeeze of lime; I'm not convinced that this is actually what it needs, but it's just a little boring in its current form. Perfectly pleasant, but unexciting. Oh dear, I think I've just baked the Hardys wine of the flan world...Incidentally, if anyone's wondering why the first two photos in this post are so much better than the others from today, it's because those two are courtesy of Kenny!

'Tis the season for blackberrying

Blackberries are in season right now - so go to your nearest hedgerow and grab an armful! (Mind the thorns!). Here's what I did with mine.

Apple and Blackberry Flan
Ingredients
For the pastry
  • 290g Plain flour
  • 165g Butter
  • 95g Caster sugar
  • Very cold water
For the filling
  • 50g Butter
  • 75g Dark muscovado sugar
  • 500g Diced Braeburn apples (3 good sized apples)
  • 445g Blackberries
  • 100g Honey
  • 1 1/2 tsp Ground cinnamon
Method
  1. Sift the flour into a bowl and rub the butter in until it resembles coarse breadcrumbs.
  2. Mix in the caster sugar.
  3. Add just enough water to bind into a dough.
  4. Roll out and line a flan ring and a sandwich tin, reserving some dough for decoration.
  5. Prick the base both all over with a fork.
  6. Refrigerate for 10 mins.
  7. Line and weigh down both cases with baking beans.
  8. Bake blind for 15-20 mins at 190C, remove the baking beans and bake for a further 5-10 mins. Allow to cool in the tin.
  9. In a saucepan, melt the butter, and mix in the sugar.
  10. Add the diced apples and cook over a moderate heat for 15 mins to soften.
  11. Add the blackberries, honey and cinnamon and stir well.
  12. Pour the mixture into the prepared cases.
  13. Roll out the reserved dough and decorate as desired.
  14. Bake at 190C for 25-30mins.
The eagle-eyed amongst you may have spotted that this is basically a modified upside-down tarte tatin. Why reinvent the wheel?! Here are the flans at the end of step 12. I think they look supremely pretty, personally.
Ready for the oven! I had intended to make them both lattice tarts, but I hadn't left enough pastry to do the big one - so I made an apple and a blackberry instead (yes, that is supposed to be a blackberry!).Finished! The pastry on each could probably have done with a little bit longer in the oven, but I was worried about the top of the filling burning. I think it's okay though. It came out of the oven bubbling and just generally looking gorgeous - I can't help but think that this would simply be fantastic served hot with a big dollop (that's a technical term, by the way) of good vanilla ice cream...

Tuesday, 6 July 2010

Verdict: Bacon and walnut cookies

Weird. But most definitely in a good way. I'm utterly perplexed - this shouldn't work, but it most definitely does. And not in a novelty way - they really stand up on their own merit. The bacon tastes exactly like you expect bacon to taste - salty and meaty. The cookies taste of bacon. But they're definitely sweet. And it just works.

I don't think the walnuts really added anything - I thought they'd provide an interesting distraction from the bacon, but they're just completely overpowered by it. And now, having tried them, I don't think that caramelising the bacon would work. But it really doesn't matter - these are pretty darned awesome in their own right.

The question is, where will it end? If bacon cookies works, how about bacon cupcakes? Or bacon cake? Bacon sorbet???!

Everything's better with bacon

Almost any food can be improved by the addition of bacon. For some foods, this is obvious; salads, burgers and chicken are clearly better with bacon. Some foods don't take much imagination to see that this might be true - for example, a good steak is perfectly good alone, but a nice slice of crispy, streaky bacon would add a lovely counterpoint to it. But the argument that all food is improved by bacon is generally derailed by desserts; certainly, I don't want any bacon with my Black Forest Gateau thank-you-very-much.

But I don't see why this should be true of cookies. Well, let's see, shall we?

Bacon and Walnut Cookies
Ingredients
  • 3 Rashers unsmoked bacon (25g cooked weight)
  • 40g Butter
  • 80g Caster sugar
  • 1 Egg
  • 1tbsp Honey
  • 1tsp Vanilla extract
  • 75g Self-raising flour
  • 40g Walnuts
Method
  1. Rinse the bacon to remove excess salt.
  2. Trim off all the fat from the bacon and finely chop.
  3. Fry the bacon until crispy. Set aside to drain.
  4. Cream the butter and sugar together until fluffy.
  5. Beat in the egg, honey and vanilla extract.
  6. Finely chop the walnuts.
  7. Sift the flour into the mixture and fold in with the bacon and walnuts.
  8. Spoon onto greased baking trays and bake at ~190C/Gas Mark 5 for 10-12 minutes until golden.
  9. Remove to a wire rack to cool.
Here is the bacon after frying (end of step 3). It looks surprisingly like the artificial bacon bits you can buy.
Ready for the oven (step 8).
Fresh from the oven - I slightly overcooked them, but I think I've gotten away with it.
I had (what I thought was) a genius idea just before I baked this, but I couldn't be bothered effect it - that of caramelising the bacon bits after frying. If this turns out well, maybe I'll give that a go next time around...

Saturday, 5 June 2010

Quickie brownies

I'm going away on a conference in about the week, so tomorrow's going to be my last OUCKC session for the year, so I thought I'd bake something and bring it along. This is essentially this brownie recipe that I did last year with less faff. And apparently some clubmembers are mildly (not deathly) allergic to nuts, so I'm doing half with nuts and half without.

Quickie Brownies
Ingredients
  • 110g Chocolate
  • 110g Butter
  • 110g Plain flour
  • 1/2 tsp Baking powder
  • 210g Caster sugar
  • 2 Eggs, beaten
  • A decent slug* Vanilla extract
  • A few handfuls** Chocolate chips
  • A handful Almonds
  • A decent slug Almond extract
Method
  1. Melt the chocolate and the butter in a double boiler.
  2. Remove from the heat and sift in the flour, sugar and baking powder.
  3. Once cool enough, beat in the eggs and vanilla extract.
  4. Stir in the chocolate chips and pour half of the mixture into a greased sandwich cake tin.
  5. Add the almonds and almond extract to the remainder and pour into a greased sandwich cake tin.
  6. Bake at 180C/Gas Mark 4 for ~25 mins.
  7. Allow to cool for 10 minutes before removing from the tin.
Ready for the oven (end of step 5). The nuts are the white bits in the one on the right.Just out of the oven.I've never had this happen to me before... I'm getting the impression that I didn't grease the sides of the tin quite well enough! The other one released from the tin really rather easily. Oh well, it's not going to affect the taste at least.*Yes, that is a standard unit of measurement when I'm baking.
**And so is that.

Tuesday, 1 June 2010

Verdict: Pretzels (Take II)

Wow. I'm utterly impressed - these are exactly as I remember from Oktoberfest (except much smaller - maybe next time I'll just make one giant pretzel). Absolutely incredible! Next time I should go and get some Erdinger in...

Baked not grilled

The oven's fixed so time to give it another go! Minor changes to the recipe this time around, but they are only slight changes.

Pretzels (Take II)
Ingredients
  • 400g Strong flour
  • 1 sachet Fast-acting yeast
  • 1.5tsp Salt
  • 150ml Water
  • 100ml Milk
  • Coarse salt
  • ~3tsp Bicarbonate of soda
Method
  1. Mix the flour, yeast, salt, water and milk in a bowl and form a dough.
  2. Knead the dough for ~20 minutes and leave to rise until doubled in size, covered.
  3. Gently press the air out and knead the dough for ~10 minutes more.
  4. Divide into 4 equal portions. and leave for ~45mins to prove.
  5. Roll each portion out into a sausage shape, roughly 50cm long then shape into pretzel shapes.
  6. Bring a large pan of water to the boil. Boil the pretzels individually for about a minute, then remove to a paper towel to dry.
  7. Oil a baking sheet well.
  8. Make a solution of bicarbonate of soda in a mugful of water. Dip each pretzel in the solution, sprinkle with the coarse salt and place on a well-oiled baking sheet.
  9. Bake at 190C for 20-25 mins until dark golden brown.
  10. Remove to a wire rack to cool.
Here are the newly shaped pretzels (end of step 5).
After boiling (end of step 6).And the finished product! What a difference an oven makes. Oh my word though, they look good!I should probably confess that the photos are very slightly disingenuous - the pretzels baked on a roasting tray stuck like crazy and I left the bottom layer on the tin. But the one baked on a non-stick tray posed no such problems. But man, don't those look good?!

Friday, 21 May 2010

Verdict: Pretzels (Take I)

Disappointing. They're just bread. Very edible - actually quite nice - but they're not pretzels - it just tastes like bread. Good bread, but just bread. I think they suffered massively from not being baked. I'll give it another go at some point when I have a working oven and we'll see how it turns out!

A taste of Oktoberfest

I went to Oktoberfest last year. It was really quite awesome, so I thought it would be nice to recreate a little part of it in the form of pretzels. This is the recipe that I've used. Now all I need is a Maß of Hofbräu, a Bavarian brass band and a couple of pretty girls in Dirndln...

Pretzels (Take I)
Ingredients
  • 400g Strong flour
  • 1 sachet Fast-acting yeast
  • 1.5tsp Salt
  • 150ml Water
  • 75ml Milk
  • Coarse salt
  • ~3tsp Bicarbonate of soda
Method
  1. Mix the flour, yeast, salt, water and milk in a bowl and form a dough.
  2. Knead the dough for ~20 minutes and leave to rise until doubled in size, covered.
  3. Gently press the air out and knead the dough for ~10 minutes more. Divide into 4 equal portions.
  4. Roll each portion out into a sausage shape, roughly 35cm long then shape into pretzel shapes.
  5. Leave for ~45mins to prove.
  6. Bring a large pan of water to the boil. Boil the pretzels individually for about a minute, then remove to a paper towel to dry.
  7. Oil a baking sheet well.
  8. Make a solution of bicarbonate of soda in a mugful of water. Dip each pretzel in the solution, sprinkle with the coarse salt and place on a well-oiled baking sheet.
  9. Bake at 190C for 20-25 mins until dark golden brown.
  10. Remove to a wire rack to cool.
There are enough photos of balls of dough up here already, so I didn't bother this time around. The first photo is from halfway through step 4 - our sausage shaped bits of dough.
And then the now (sort of) pretzel-shaped dough at the end of step 4. As you can see, I was experimenting a bit with variations on the shape. I'm not terribly happy with any of them actually - but we'll see how they look once they're baked!
But more importantly, I should have read the recipe a little more carefully. You're supposed to let it prove before shaping into pretzel shapes. Oops. Well, here's what happens if you don't (end of step 5). Ah well, you live and learn.
Ready for the oven (end of step 8).Unfortunately, there was a much bigger problem: I discovered that my oven is broken. So after about half an hour of the oven not warming up, I eventually managed to (sort of) bake the pretzels by using the still-functioning grill to heat the oven up. As a result, they're as much grilled as they are baked. Here's the final result.

Sunday, 25 April 2010

Verdict: Tiger bread

Well, it's not exactly what I'd call tiger bread. The fact that the crust isn't speckled is testament to that fact. But, having said that, it is rather a good loaf. The crust is, I believe, the best crust I have ever had on a loaf of bread; an almost perfect example of that elusive balance between hard and crunchy, soft and chewy, flavoursome and not burnt. The body of the bread is a little dense, but in a good way - with that lovely texture and satisfying chewiness. It's a failure insofar as it's not really tiger bread, but it's very much a success in that it's a bloody good loaf!

Saturday, 24 April 2010

Tiger tiger tiger!

In most supermarkets that have an in-store bakery, you can buy a type of bread called tiger bread. It's, in my opinion, probably the best shop-bought, mass-produced bread available - as far as bread that's come from the Chorleywood Bread Process, it's a definite winner. So I thought it would be nice to try making it myself... the only problem is, that there's a lot of debate as to what actually goes into tiger bread. But, going with the (admittedly dangerous) assumption that the internet will get things right when averaged across sufficient users, I've taken what I view as prevailing view (as there is clearly no consensus) from this forum thread. The base bread is a standard plain white loaf and is baked in the normal way except for being brushed with the tiger paste before going into the oven.

Tiger Bread
Ingredients
For the bread
  • 500g Strong bread flour
  • 300g Water
  • 10g Salt
  • 3/4 sachet Fast-acting dried yeast
  • 10g Light olive oil
For the tiger paste
  • 1/4 sachet Dried yeast
  • 5tbsp Water
  • 1 1/2 tsp Caster sugar
  • 1 tsp Light olive oil
  • 60g Rice flour
Method
  1. Mix all the bread ingredients into a rough dough.
  2. Tip out onto a large, clean work surface and knead until smooth and elastic.
  3. Shape into a round and return to the mixing bowl. Cover and leave to rise until itroughly doubles in size.
  4. Uncover and tip onto the lightly-floured work surface and squash all over using your fingertips to deflate the dough.
  5. Knead for 5 minutes, divide and shape as required - I baked it as a loaf (mainly because I wanted to use the loaf tin David bought me for my birthday).
  6. Cover and leave to prove for ~1hr-1hr30 until roughly doubled in size again.
  7. Mix all of the ingredients for the tiger paste in a bowl and cover. Leave in a warm place for 25 minutes.
  8. Spread the tiger paste over the loaf.
  9. Place into an oven preheated to the maximum temperature, with a roasting tray of boiling water in the bottom.
  10. After 10 minutes, turn the oven down to ~200C/Gas Mark 6 and continue to bake until done - about 40 minutes.
  11. Remove from the tin and allow to cool on a wire rack before slicing.
Here's the dough just after shaping and ready for proving (end of step 5).After proving (end of step 6).
The tiger paste.The loaf ready for the oven (end of step 8).
Here's the finished loaf. The top didn't crackle - I wonder if I spread too thick a layer of the tiger paste on the top. Oh well. Bet it still tastes good though!

Thursday, 8 April 2010

Verdict: Chocolate and cherry brandy bundt cake

Oh. My. Word. This cake was absolutely amazing! I don't know if it's the best cake I've ever baked, but it's certainly a contender! As you can see, it came out of the tin mostly intact, after some serious coercion with a spatula. It lost all of its pretty fluting around the edge, but at least now I know for next time that the Bundt tin needs a lot more greasing and a lot more flour. Anyway, I think it's still fairly pretty personally, but then beauty is in the eye of the beholder and all that. But much more importantly, it tasted absolutely wonderful. Beautifully moist, and surprisingly for me, not heavy. It was wonderfully chocolatey, perfectly balanced and the cherry & almond flavour came through really nicely. Genuinely, I can't think of any way in which this cake could be improved - the sweetness was perfect, the texture was brilliant and the flavours blended together fantastically. Apparently, the people at the Magnolia Bakery really know what they're doing!

Wednesday, 7 April 2010

Cherries ≅ Almonds?

It's Lindsey's birthday tomorrow, so I'm baking her a cake. One of my recent purchases was a Bundt/Kugelhopf cake tin, which I'd quite like to try out. So having looked through my baking books, there was a standout recipe - the Chocolate Amaretto Bundt Cake from the Magnolia Bakery book that my friend Teia sent me for my birthday. The only snag was, I don't have any Amaretto. But looking at my drinks collection, I do have a bottle of cherry brandy that I think will substitute nicely, so hopefully it'll work well!

Chocolate and Cherry Brandy Bundt Cake
Ingredients
  • 230g Butter
  • 240g Caster sugar*
  • 150g Soft brown sugar*
  • 4 Eggs
  • 170g Dark chocolate
  • 235ml Milk
  • 3tsp Almond extract
  • 1tsp Vanilla extract
  • 220g Plain flour
  • 1tsp Bicarbonate of soda
  • 4tbsp Cherry brandy
Method
  1. Cream the butter and sugars together until fluffy.
  2. Beat in the eggs, one at a time.
  3. Melt the chocolate and mix in.
  4. Stir in the milk, almond extract and vanilla extract.
  5. Gradually sift in the flour and baking powder, beating the mixture smooth after each addition.
  6. Stir in the cherry brandy.
  7. Pour into a greased and floured Bundt cake tin and bake at 180C/Gas Mark 4 for ~45-50 minutes. Test with a skewer.
  8. Allow to cool in the tin for ~20 minutes before turning out onto a wire rack.
*The recipe actually calls for 190g caster sugar and 200g soft brown sugar, but I ran out of soft brown sugar. I don't think it'll make a massive difference, though it might be a little less flavoursome!

This cake batter is amazing! At the end of step 3, before the almond and vanilla extracts went in, it smelt like Ovaltine. Absolutely wonderful. But having never baked a cake like this before, I have no idea how much it'll rise... I've got a nasty feeling that this might overflow! Yup! It overflowed. Not horrendously though. I'm just really hoping it's cooked all the way through now. And that it'll come out of the tin...
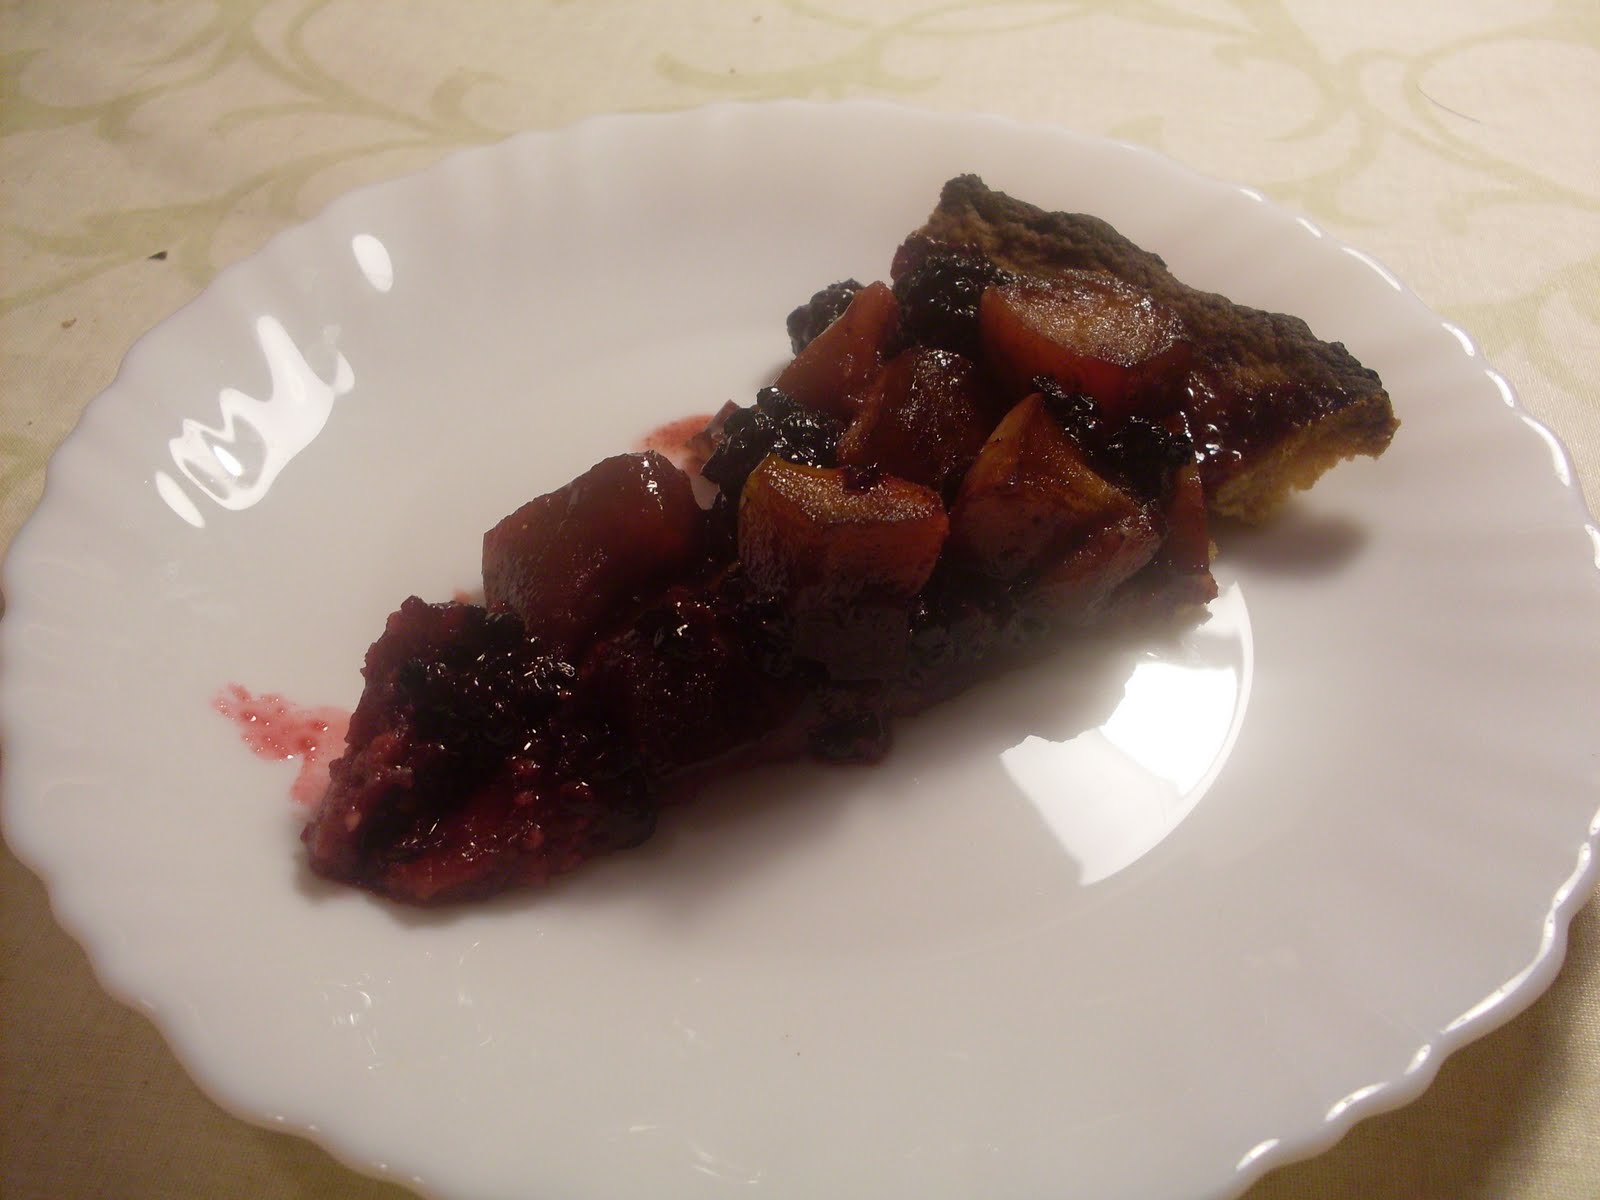
But no! Disaster! The cake was absolutely stuck fast. In desperation, I tried taking a turboflame lighter to the outside of the tin trying to heat it up in the hope that the expansion might help free the cake. And when that failed, I googled for ideas, trying one that suggested doing similar but using a tea towel in the kitchen sink soaked in boiling water to heat the tin up. On the plus side, I did find out that the cake is indeed cooked through. It's also rather moist and tastes excellent too, so a big thumbs up for the recipe. It's just a shame it didn't come out of the tin. And it would have been so pretty too. Oh well, I'll let the cake cool in the tin and then we can just hack it apart when we serve it tomorrow!You saw that coming though, right? I was definitely half-expecting it...

Sunday, 4 April 2010

Verdict: Plain, boring fudge

Surprisingly, it's actually rather good! Surprising, for those who don't know, because I don't actually like fudge. It's definitely recognisably fudge - quite a solid, almost crunchy fudge, but definitely a fudge. It's ludicrously rich and still nauseatingly sweet like most fudges too, but unlike most fudges, I can eat more than one piece before feeling queasy - which is really quite a high standard for me with fudges. I'll bring it into the lab next week and get some more opinions...

And look! It came out of the tin in one piece! Actually, it just slid out; I'd been expecting to have to chip it out!

[Edit]It won quite a few compliments at the lab too. Maybe it really is pretty decent fudge after all...[/Edit]

The Fudge Factor

I bought a 397g tin of condensed milk (anyone know why it's sold in such a random quantity?) for the pineapple buns, but had no idea what to do with the remaining 300g of it. So naturally, I asked people on Facebook and the best suggestion I got back was to make fudge. Here goes...

Plain, Boring Fudge
Ingredients
  • 300g Condensed milk
  • 4tbsp Water
  • 300g Sugar
  • 45g Butter
  • 1tsp Vanilla extract
Method
  1. Place all the ingredients in a pan and heat gently, stirring constantly to a temperature of 116C.
  2. Remove from the heat and beat until the fudge thickens (about 10 minutes).
  3. Pour into a greased tin and allow to cool.
Here's the fudge just after pouring. I think I should have poured it a bit earlier - as you can see, parts of it have already mostly set! It's not going to win any awards for prettiness...