Saturday, 21 January 2017

Mk2 Pineapple

Way back in 2010, I tried making pineapple buns. For those of you who aren't familar with pineapple buns, it's a soft, sweet bread from Hong Kong with a distinctive crunchy crust. It was also officially declared a part of the cultural heritage by the Hong Kong government in 2014. Not that I care about that at all - I just like the taste of the things! Well, my first attempt was a partial success. My Hong Konger (yes, as weird as it sounds, I am led to believe that that is the correct term) friend, Pok, said that the topping tasted completely authentic, but we both agreed that the bread was far too firm and not nearly soft enough. I think a second attempt is well overdue now, so I'm keeping the recipe for the topping, but throwing the bread recipe out of the window. In its place, I'm adapting one from an old Chinese cookbook that I happen to have on the shelf - "Chopsticks Recipes More Dim Sum" by Cecilia J. Au-Yang.

Pineapple Buns Mk 2
Ingredients

For the bread yeast paste
  • 1 Sachet dried yeast
  • 1/2 tsp Sugar
  • 60ml Warm water
  • 3 tbsp Strong bread flour
For the bread dough
  • 280g Strong bread flour
  • 60g Sugar
  • 1 Egg
  • 1 tbsp Condensed milk
  • 80ml Warm water
  • 50g Melted butter
For the topping

  • 60g Caster sugar
  • 60g Butter
  • 100g Plain flour
  • 1 tsp Bicarbonate of soda
  • 2 tbsp Condensed milk
  • 1 Egg yolk
  • Few drops vanilla extract
  • 1 Whole egg
Method
  1. Mix the ingredients for the yeast paste together into a paste and leave to prove for ~half an hour.
  2. Form a dough from the yeast paste and all of the bread dough ingredients except the melted butter and knead until smooth.
  3. Knead in the melted butter and cover and leave to rise for ~1 1/2 hours.
  4. Cream the butter with the sugar and then beat in the rest of the rest of the ingredients for the topping except the whole egg.
  5. Refridgerate the topping for an hour.
  6. Knead once the bread dough again, divide into small bun-sized portions, shape and leave to prove for ~1 1/2 hours on a lined baking tray.
  7. Divide the topping into even portions. Roll each portion out into a disc and cover each bun with one.
  8. Beat the egg and brush over the buns.
  9. Bake at 190C for ~15 minutes until the top is light golden.
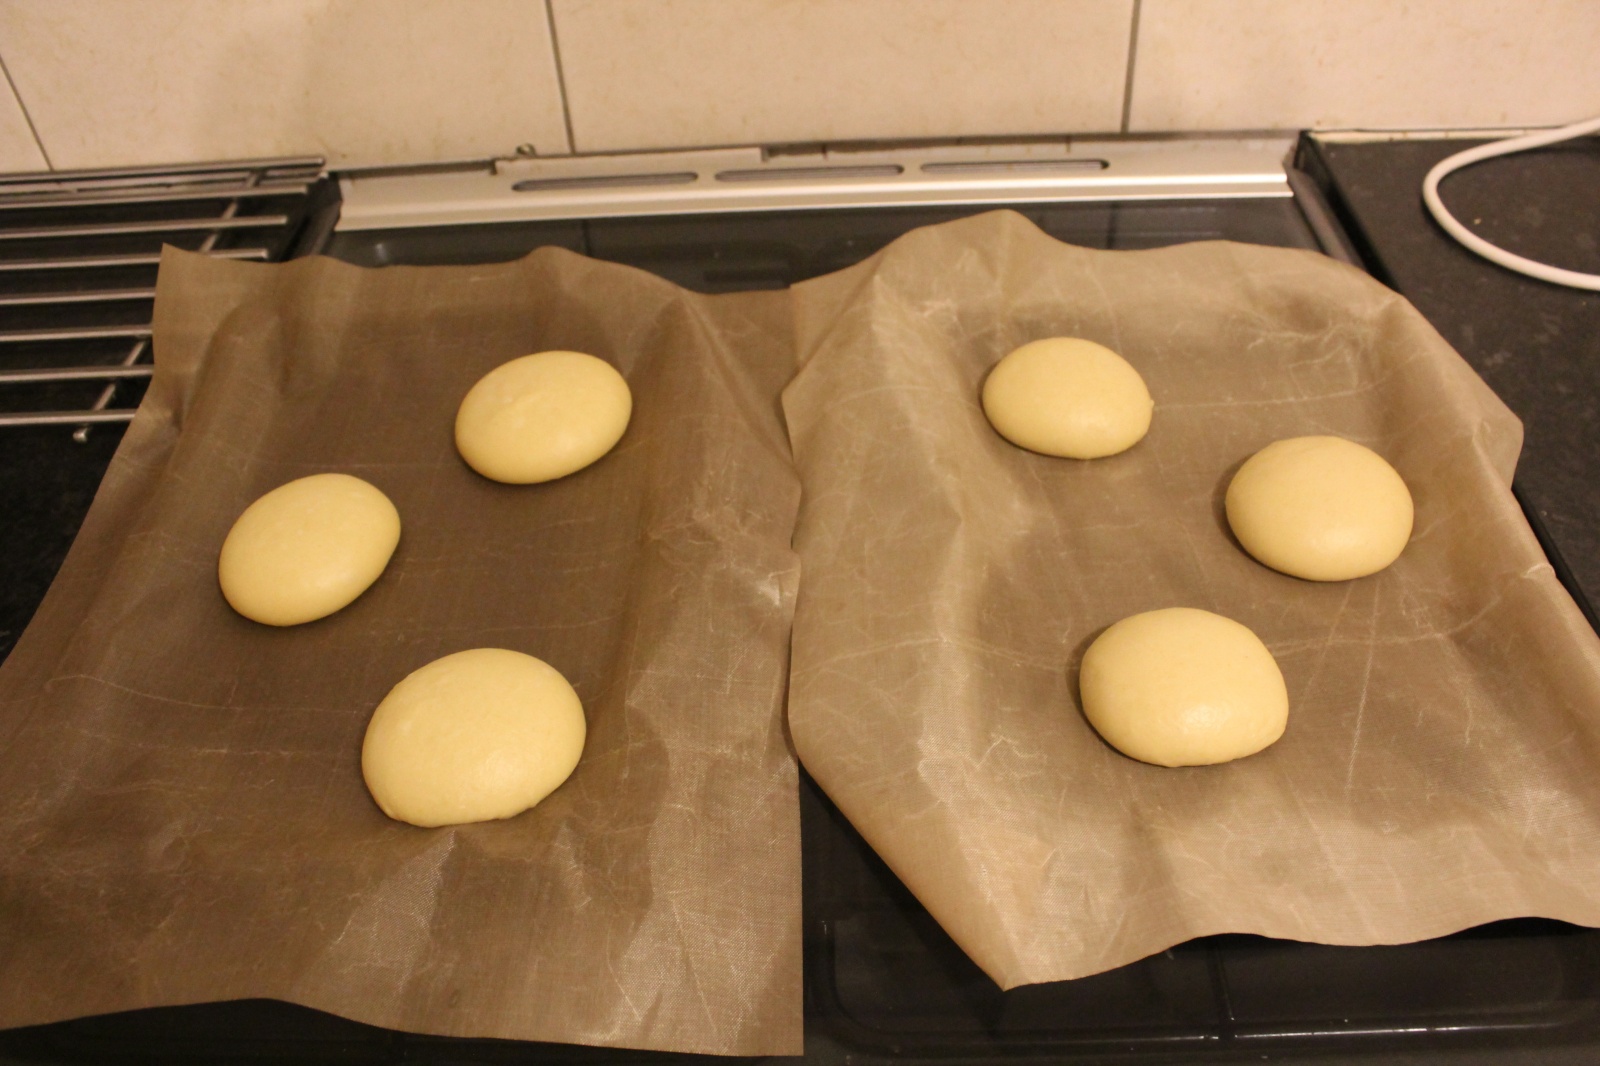
Here they are before the prove. Pretty, no? 

But here they are again after the prove. As you can see, they've not risen at all really - clearly, it's not fermented properly. I have no idea what I've done wrong though - it's possible that the yeast was actually just too old and no longer alive, but I'm not 100% certain. Oh well, it's not going to stop me from baking it anyway!

And now with the topping added. I only actually used half of the topping in the end - I think the quantities of topping vs dough are pretty badly mismatched.

And here they are, ready for the oven.

Disaster! I was overly heavy handed with the egg wash, and you can see that the topping hasn't come out right. Plus, the top was soft, not crunchy.

The least-bad one of them...

So, it all seemed to go wrong at the end. But how did it taste anyway? Well, obviously, as the rise didn't work properly, it was very dense. I mean really, really dense. But also lovely and soft - so actually quite pleasant actually. The topping never went crunchy though, so a bit of a failure on that front. The flavour was nice though - the sweetness was about right in my opinion. All in all, it was definitely mostly a failure, but a tasty one nonetheless. I'll have to give them another go again soon!

Saturday, 7 January 2017

A birthday cake

It was Fiona's birthday yesterday, so I said that I'd bake her a birthday cake this weekend. She likes Black Forest gateaux (as, incidentally, do I), but it's one of those faffy cakes that I don't tend to bake because it's so much effort. So what better excuse than her birthday! It's the same recipe as I used last time (waaaaay back in 2009!), with the only minor changes that I let the mixture down with a splash of milk before adding the egg whites because the batter looked really stiff, and I had to halve the quantities for the cherry gel because I only had one jar of morello cherries. But that's okay, as somewhere along the line, I lost my 20cm cake tin, so had to bake it in a larger, thinner one, which means that this one only has two layers - and I still ended up with leftover cherry gel. I guess having only two cake layers means it's not a proper Black Forest gateau, but then I guess none of my cakes are ever that accurate anyway!

Here it is straight from the oven. Less burnt than last time, but more cracked!

But as expected, once flipped over, it's looking lovely. I think it may have gone a bit dry, but we'll see how it is once it's actually finished.

My word, Black Forest gateau is a lot of work. The end result is really pretty though! The photos don't really do it justice; it turns out that my new phone really does have an appalling camera.


This is one seriously decadent cake. It's as delicious as you'd expect a cake with 800ml of cream to be!

Sunday, 1 January 2017

New year's loaves

Happy new year! This new year's day, I'm baking some bread. Not because it's the new year, mind you; it's because we've got some leftover salad that looks a little ropey, and I think it'd be a fine addition to some bread (and because I've got time today!). It's not going to be anything particularly adventurous (fundamentally it's just an ordinary sourdough loaf), but it's still nice to get baking!

Leftover Salad Bread
Ingredients
  • A generous dollop of Aage
  • 500g Strong wholemeal flour
  • 250ml Warm water
  • 10g Salt
  • A slug (~10g) of olive oil
  • ~55g Leftover salad (lambs lettuce, olives, spring onions, mustard, olive oil and salt)
Method
  1. Mix Aage, the flour, water, salt and olive oil together and form a dough.
  2. Knead until not sticky.
  3. Put in bag to rise for ~1 hour until doubled in size.
  4. Deflate and knead.
  5. Divide into two portions and knead the leftover salad into one.
  6. Shape into loaves, return to the bag and prove for ~2 hours until doubled in size.
  7. Bake at 220C for 10 minutes, then turn down to 190C for a further 30 minutes.
The salad turned out to have quite a lot of olive oil and moisture in it, which made the half of the dough with the salad rather sticky. I opted to shape the plain ball of dough into something approximating a bâtard, but the salad-infused one ended up as a generic boule shape because it was too sticky to shape! Here they are before the prove.

Ready for the oven. As you can see, slashing the plain loaf didn't exactly go to plan. It turns out that the kitchen knife I tried to use was not nearly sharp enough. I reverted to a bread knife for the salady one, which worked better. They are clearly underproved (which I'm pretty sure is due to insufficient sourdough starter activity - I really need to plan my bread baking further ahead so that I can get Aage out of the fridge and woken up properly beforehand!)

As ever, they look gorgeous coming out of the oven.

The salady one is slightly underbaked. I did think that that might happen, given the extra moisture and oil in it, but it's not bad really - the dough is cooked all the way through, it's just a little cakey in the middle. Lovely flavour though - the spring onion gives a really nice fragrance, and the chopped up olives provide the usual lovely bursts of salty punch. The lettuce cooked away to nothing, but that's exactly as expected. I'm definitely going to add spring onion to bread again in the future!

Tuesday, 20 December 2016

It's always time for cookies

I'm off home for Christmas a couple of days before Fiona, and wanted to bake something to sustain her! I'm just baking a double batch of my usual cookie recipe, except for having discovered that we don't appear to have any almond extract, so I've substituted vanilla extract. It's been so long since I baked these cookies, I'd forgotten how good they smell in the oven!

Saturday, 17 December 2016

Woo! Baking again!

This term has been pretty manic, so I've not really had a chance to bake. But term's over now, so I finally have a chance. By very popular demand (by which I mean that Fiona was very insistent!), it's a reprise of my cinnamon rolls - with only the minor change that I've substituted out the gin for apple juice. The glaze came out really appley, which was a bit of a surprise, but I think it works really well. And the cinnamon rolls themselves? Every bit as good as we remembered!

Apologies for the potato-quality photos. I couldn't be bothered to get my SLR from upstairs, and the Nexus 4's camera wasn't exactly great when it was brand new...


Sunday, 18 September 2016

Not quite "baking" even in the loosest sense of the term

I've wanted to bake something for the last few weekends, but always seem to be lacking at least one out of time, energy or key ingredients. Today is a day where I'm lacking in energy, but I saw this recipe earlier, and thought that it looked like it could be pretty tasty - and it's the sort of recipe for which I think I've got enough energy to do right now!

No-bake peanut butter bars
Ingredients
  • 140g Butter
  • 150g Brown sugar
  • 150g Caster sugar
  • 270g Smooth peanut butter
  • 180g Darkish (51% cocoa) chocolate
Method
  1. Melt half of the butter and mix in the sugars and peanut butter.
  2. Press into a foil-lined tin.
  3. Melt the chocolate and the remaining butter together and pour over the top of the peanut butter mixture.
  4. Refrigerate for at least 3 hours until set.
  5. Cut into squares.
Talk about low effort! This might also be *the* most unhealthy thing I've baked made. I've already (fairly drastically) reduced the amount of sugar added (not, I hasten to add, on health grounds), but fundamentally, this recipe is just peanut butter with added sugar and butter!

Here's the peanut butter mixture in the pan.

Ready for the fridge!


Monday, 22 August 2016

The joys of working from home

I've been a bit ill over the last few days and I'm still not feeling back to normal, so I decided to work from home today. It's been the first time I've worked from home for quite a long while, and it's actually worked out quite well - I've been surprisingly productive. I'm doing some programming for work at the moment, which does mean that periodically I need to wait for 15 minutes while my code runs to give me some results for debugging purposes. As I'm home, I thought that rather than wasting that time on the internet, I'd get Aage out and have a bit of a play (yes, I'm a terrible pet owner - Aage does get horribly neglected). I just did a standard, half-quantities loaf of bread (250g wholemeal flour, 150g water, 5g salt, half of Aage), with a handful of chopped up olives out of a jar thrown in for good measure (which is why I left the oil out of the dough), but still a good use of spare time I'd say! I was really pleased with this loaf. The rise was pretty good, and the texture was lighter than my average sourdough loaf as a result, but what really made it was the crust! Not too hard, but developed well enough and with a fantastic crunch.


Sunday, 19 June 2016

Cola revisited

Two years ago, I tried doing cola cookies, and it turned out to be one of the more memorable failed attempts for me. The taste of the cookies was fine, as I recall, but the texture was just not right - partly because I tried adding cola bottle sweets, and they just melted and went hard. Since then, I've had an otherwise untouched bottle of cola syrup (for a Sodastream machine), and I think it's time to try something else with it!

I figured cake is probably the safer way to go, and it just so happened that Serious Eats has a cola cake recipe that I can crib. I'm not following it exactly, but it's pretty close!

Cola cake
Ingredients
  • 225g Dark brown sugar
  • 100g Caster sugar
  • 200g Butter
  • 2 Eggs
  • 3tbsp Cola concentrate
  • 1tsp Vanilla extract
  • 250g Self-raising flour
  • 1/2tsp Baking powder
  • 1/2tsp Salt
  • 35g Cocoa powder
  • 200ml Buttermilk*
Method
  1. Cream butter and sugar in a bowl.
  2. Beat in the eggs, cola concentrate and vanilla extract.
  3. Fold in the flour, baking powder, salt and cocoa powder.
  4. Stir in the buttermilk.
  5. Pour into a lined, greased pan and bake at 180C for ~45mins.
*If you happen to have a Polish food shop near you, go there for buttermilk. It's called maślanka and is absurdly cheap compared with buying it in a supermarket (assuming, of course, your supermarket even sells the stuff) - a 400ml carton of the stuff cost me 40p from my local one!

Here's the mixture at the end of step 3 (before the buttermilk got added). It's a particularly satisfying looking mixture.

And after adding the buttermilk. I don't actually know how thick the mixture was supposed to be, so I was guessing - it's very reminiscent of chocolate Angel Delight in appearance! It was also about this time that Fiona told me that she's not sure she likes cola as a flavour...

Ready for the oven. I think this batter looks particularly good!

It still looks good after baking!


It was slightly underbaked - as you can see in the last photo, it's a bit fudgey in the middle, but not horrendously. Overall, it's not bad - especially given how many unknowns there were and how much guesswork was involved in the recipe itself. I was a bit disappointed that the cake wasn't a bit more cola-ey - really, the cocoa powder turned it into a chocolate-cake-that-tasted-a-little-bit-of-cola rather than a cola cake per se. The flavour did come through somewhat though, which was nice, and the sweetness was about right (which was one thing that I had been a little concerned about). I may have to revisit this recipe at some point, omitting the cocoa powder and upping the quantity of cola syrup - I think there's still a bit more to come from this idea!

Sunday, 8 May 2016

Time for a classic

I had a tub of double cream about to go out of date, but happily, I fancied baking today - and what's more, I had Fiona as my glamorous assistant* :o). What better time to revisit a classic that I've not baked in many, many years. Time for a Victoria Sponge!

*By which I really mean Fiona did all the work.

Victoria Sponge
Ingredients
  • 85g Salted butter
  • 145g Unsalted butter**
  • 230g Caster sugar
  • 4 Eggs
  • 1 tsp Vanilla extract
  • 230g Plain flour
  • 3 tsp Baking powder
  • ~3 tbsp Milk
  • 200ml Double cream
  • 115g Gooseberry jam***
Method
  1. Cream the butter and sugar together until fluffy.
  2. Beat in the eggs and vanilla extract, a little at a time.
  3. Sift the flour and baking powder and fold in to the mixture a little at a time.
  4. Let down to a dropping consistency with the milk.
  5. Pour into two greased and floured sandwich tins and bake at 180C for ~20 minutes.
  6. Allow to cool on a wire rack.
  7. Beat the cream.
  8. Sandwich the cakes together with the double cream and jam.

**No, I didn't run out this time, I was just using up the leftover salted butter from the last time around!

***I probably wouldn't have opted for gooseberry jam specifically, were it not for the fact that I didn't have any strawberry/raspberry jam, but did have a cute little jar of gooseberry jam that had been Phil and Jess' wedding favours when they got married many years ago. It's specially aged, alright?!

 Here's Fiona doing all the work (did you think I was joking when I said that?).


Ready for the oven! As you can see, I didn't really let the batter down enough, so it's rather stiff. That one's entirely my fault though!

Out of the oven, they're a little dark and a little domed, but not too bad overall.

Getting them out of the tins could have gone better though. In hindsight, lining the bases with baking parchment would have been a good idea.

So I won't win any awards for prettiness with this cake. I might have slightly run out of patience while waiting for the cake to cool...


Actually though, the finished product doesn't look that bad really!


It's a Victoria sponge. Not the most exciting cake in the world, but it's become a classic for a reason. I think Victoria sponges get a bit of a bad rep because of the terrible supermarket versions - they're always pretty, but inevitably dry, bland and disappointing. This one is almost the exact opposite - not even remotely neat, but it's almost succulent. The sponge is moist, and the vanilla really comes through. The jam gives a nice zing (the gooseberry gives a bit more interest flavourwise than strawberry would have), while the fresh cream just smooths it all over. A Victoria sponge will never be my favourite cake, but a good edition is still worth baking. This one is a pretty decent one, I'd say!

Monday, 2 May 2016

Bank holiday baking

It's a bank holiday! I've completed my DIY projects for the long weekend, which means that it's definitely time to get baking :o). Today's recipe: Snickerdoodles. It's essentially this one from Serious Eats, but without coconut oil (so in effect, it's crossed with this recipe).

Snickerdoodles
Ingredients
For the biscuits:
  • 40g Unsalted butter
  • 160g Salted butter*
  • 200g Caster sugar
  • 100g Granulated sugar**
  • 1 1/2 tsp Vanilla extract
  • 1 Egg
  • 1 tsp Baking powder
  • 325g Plain flour
For the coating:
  • 60g Caster sugar
  • 10g(!) Ground cinnamon
Method
  1. Cream the butter and sugar together until fluffy.
  2. Beat in the vanilla extract and egg.
  3. Incorporate the baking powder and flour.
  4. In a separate bowl, mix the caster sugar and cinnamon together.
  5. Roll the dough into 2-3cm diameter balls and coat in the sugar/cinnamon mix.
  6. Flatten slightly onto a baking tray and bake at 200C for 5 minutes then reduce temperature to 175C and bake for a further 5 minutes.
  7. Sprinkle with some of the leftover sugar/cinnamon mix. Allow to cool on the tray for a few minutes before moving.

*In case you hadn't already guessed, I ran out of butter and had to make do with what they had in the corner shop at the end of my road, which meant salted butter. Happily though, the salted butter is 2% salt, which means that this is effectively ~3g salt; pretty much what I would have added separately.
**Yes, I ran out of caster sugar as well. How did you know?

Apparently, I've angered the gods of baking recently. Apart from the (not altogether unusual) running out of key ingredients, my usual kitchen scales threw a bit of a fit and started reading around half the correct weight. Happily, I did notice, but not before thinking that I'd been cheated by the corner shop and bought a "200g" block of butter that only weighed 100g... (I've since removed the batteries and put them back in and now my scales are back to normal).

Here are the balls of dough before coating. Obviously, I didn't bake them this close together on the trays. Don't they look satisfying?


Ready for the oven. I thought I'd try a little experiment - the bottom right tray have an extra dusting of the sugar/cinnamon mixture, while the other two trays only had as much as would stick to the dough.

 I have got to get myself some bigger baking trays! But don't they look good? The ones with extra dusting have come out a little darker than the others, but aren't burnt. I think they're pretty gorgeous personally!


But as ever, what counts is how it tastes. While still warm from the oven, I snaffled my first taste - they've got a lovely texture - a great outer crunch coupled with a melt-in-the-mouth soft interior - and the cinnamon tastes great! The actual dough itself is (unsurprisingly) bland though, so it's all about the cinnamon on the outside. There's surprisingly little difference between the ones where I put an extra (thin) layer of sugar/cinnamon on the top before baking, but they're really helped by the post-baking sprinkle.

Truth be told though, I think they're actually too rich. The biscuits are so butter-and-sugar-heavy, you start feeling slightly queasy after only one and a half of them. They're nice - actually a bit better once they've cooled and are a bit firmer - but just a bit too buttery for my tastes. I suspect they'll go down a storm in the lab tomorrow though!

Sunday, 7 February 2016

Simple oat raisin cookies

Urgh. I'm ill and feeling a bit sorry for myself this weekend. I also fancy some cookies, but I'm thinking I should branch out a bit from my regular cookies. Of course though, feeling under the weather also means that I can't be bothered to do anything that would require very much faff at all - so simple is the name of the game. The inspiration came from this recipe, though it's hardly anything out of the ordinary.

Simple Oat Raisin Cookies
Ingredients
  • 100g Plain flour
  • 1/2 tsp Baking powder
  • 100g Porridge oats
  • 50g Caster sugar
  • 75g Sultanas
  • 100g Butter
  • 1 tbsp Honey
  • 1 tbsp Black treacle
Method
  1. Mix flour, baking powder, oats, sugar and sultanas together.
  2. Melt the butter, honey and treacle together, then stir into dry ingredients.
  3. Roll into small, squashed-meatball shapes, place onto a lined tray and bake at 180C for ~15 mins.
Here's the mixture before forming. As you can see, it's rather crumbly, so you need to press the mixture together just like you're making meatballs.


Fresh from the oven. I find it quite hard to tell how cooked oat cookies are, and I think I may have ever-so-slightly overdone them.


I tried so hard to get all of them to fit onto my cooling rack. I think I might need to get a bigger rack!

They do look good though, don't they?

Well, I needn't have bothered trying to cram them all onto the cooling rack - the four that didn't fit (and several more to boot) were devoured in an instant (not just by me, I hasten to add; Fiona did help!). These were just about everything that I had hoped for - slightly crunchy, deliciously chewy and just the right amount of crumbly. There's a wonderful hint of toffee from the sultanas, and a rich, dark after taste from the treacle. These are very good cookies - probably not right up at the top of my list, but when you factor in how easy they are to make, they definitely warrant another go at some point. Perfect for a lazy Sunday afternoon in the conservatory with Radio 4 and a cup of tea! We'll see how they are once they cool down, but fresh from the oven, they're pretty wonderful!