Cinnamon Rolls
Ingredients
For the dough
- 450g Strong white flour
- 1tsp Salt
- 50g Caster sugar
- 1 sachet (7g) Fast action dried yeast
- 75g Butter
- 220g Milk
- 1 Egg
For the filling
- 150g Sultanas
- 150g Gin
- 100g Butter
- 100g Caster sugar
- 3tsp (~5g) Ground cinnamon
- 1 Egg
- 50g Caster sugar
- Pour the gin over the sultanas and allow to soak.*
- Mix the flour, salt, sugar (for the dough) and yeast together in a mixing bowl.
- Rub in the butter (for the dough).**
- Make a well in the centre of the mixture and pour in the milk and egg (for the dough). Mix gently to form a dough.
- Turn the dough out onto a clean surface and knead until smooth and elastic.
- Place dough into a greased bowl, cover with a damp teatowel and leave to rise for ~90mins.
- In another mixing bowl, beat the butter (for the filling) with the sugar (for the filling) and cinnamon until well combined into a paste.
- Once the dough is done rising, knock the air out of it, tip onto a clean surface and spread out into a rectangle between A4 and A3 in size, a few millimetres thick (the original recipe suggested aiming for the thickness of a one pound coin).
- Spread the cinnamon/sugar/butter paste over the entire rectangle, covering it right to the edges.
- Drain the sultanas (setting aside the gin) and sprinkle evenly across the dough.
- Roll the dough up in the direction of the short side, then cut into 12 even pieces.
- Lie the slices down (cut sides down) in a lined roasting tin, cover with a damp teatowel and leave to prove for ~45mins.
- Beat the remaining egg and brush the tops of the rolls.
- Bake at 200C for ~10 mins, then turn oven down to 180C and bake for a further 20 mins.
- Heat the gin drained from the sultanas with the sugar (for the glaze) in a saucepan, stirring until dissolved. Simmer gently and reduce down to a few tablespoons of volume.
- Brush the syrup over the rolls as soon as they come out of the oven, then transfer them on to a wire rack to cool.
*Rum would have been more conventional (and probably would have worked better) but I didn't have any rum in stock, so I used gin instead. I used Tanqueray, but I don't think it would make a huge difference if I'd used any of the other gins from my cupboard. In hindsight though, I should have used kirsch or cherry brandy instead of gin, both of which I did have on my shelf.
**I actually managed to forget to do this step, and so had to rub the butter in together with the milk and egg. I don't think it will make any significant difference, but it was certainly less easy than it would have been if I'd not been so absent-minded!
This has certainly not been a fast recipe to make - I started baking at around 2:30pm this afternoon, and they eventually went into the oven just after 7pm! But it's been a lot of fun, and watching the two rising processes has been so satisfying!

I'd forgotten how easy leavened doughs can be if you use white flour and packaged yeast! Look how well the first rise went!

As you can see, I'm not very good at rolling stuff out into neat rectangles.

Now just try to tell me that that doesn't look good!

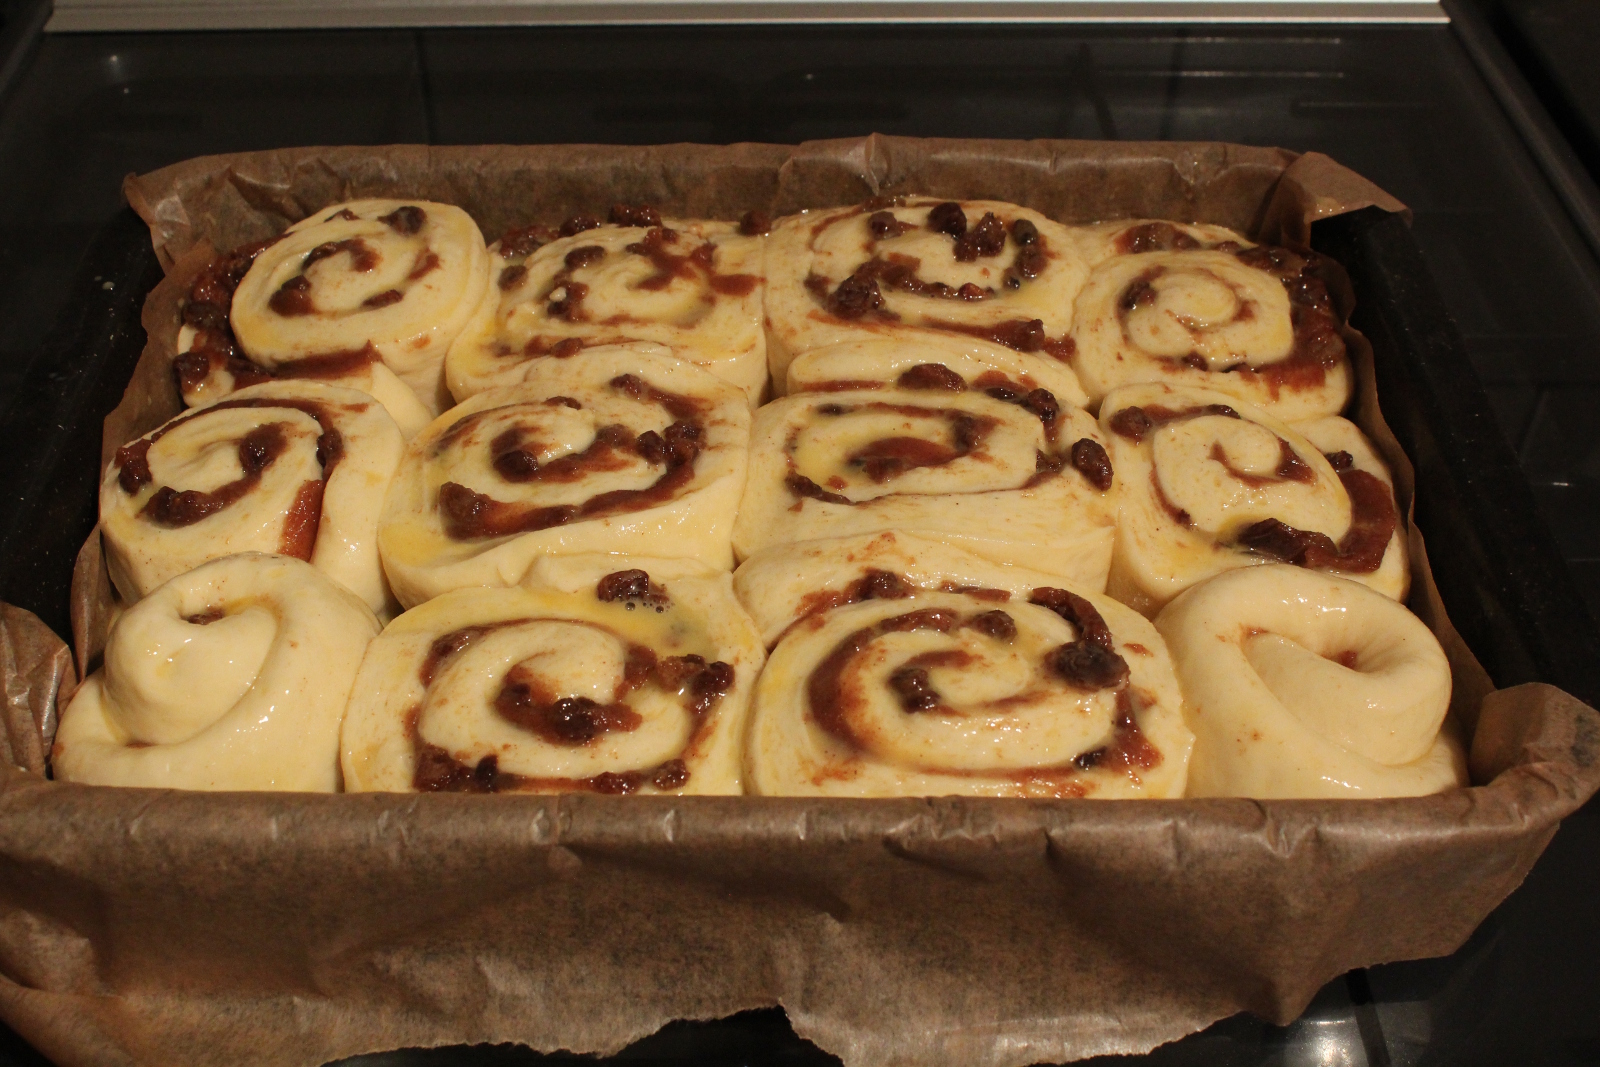
Ready for the prove. I'm expecting (and hoping) that these will rise and expand and stick together slightly to form one large tasty gooey mass!

Wow, don't those look good? They've proved so well and squidged together just as I'd hoped. Here they are ready for the oven after a quick egg wash.
I've just turned the oven down, and I can't quite get a photo that does justice to how good they look! I'm a little concerned by how brown the top has got already, but I'm hoping that it'll still turn out nicely anyway.

This is how much I reduced the glaze down to.

Fresh from the oven, they look even better than I'd hoped!

And better still after being glazed.


Just look at the insides!


Brian made some of these this past weekend for the family and they were AMAZING!
ReplyDelete