Sunday, 8 May 2016

Time for a classic

I had a tub of double cream about to go out of date, but happily, I fancied baking today - and what's more, I had Fiona as my glamorous assistant* :o). What better time to revisit a classic that I've not baked in many, many years. Time for a Victoria Sponge!

*By which I really mean Fiona did all the work.

Victoria Sponge
Ingredients
  • 85g Salted butter
  • 145g Unsalted butter**
  • 230g Caster sugar
  • 4 Eggs
  • 1 tsp Vanilla extract
  • 230g Plain flour
  • 3 tsp Baking powder
  • ~3 tbsp Milk
  • 200ml Double cream
  • 115g Gooseberry jam***
Method
  1. Cream the butter and sugar together until fluffy.
  2. Beat in the eggs and vanilla extract, a little at a time.
  3. Sift the flour and baking powder and fold in to the mixture a little at a time.
  4. Let down to a dropping consistency with the milk.
  5. Pour into two greased and floured sandwich tins and bake at 180C for ~20 minutes.
  6. Allow to cool on a wire rack.
  7. Beat the cream.
  8. Sandwich the cakes together with the double cream and jam.

**No, I didn't run out this time, I was just using up the leftover salted butter from the last time around!

***I probably wouldn't have opted for gooseberry jam specifically, were it not for the fact that I didn't have any strawberry/raspberry jam, but did have a cute little jar of gooseberry jam that had been Phil and Jess' wedding favours when they got married many years ago. It's specially aged, alright?!

 Here's Fiona doing all the work (did you think I was joking when I said that?).


Ready for the oven! As you can see, I didn't really let the batter down enough, so it's rather stiff. That one's entirely my fault though!

Out of the oven, they're a little dark and a little domed, but not too bad overall.

Getting them out of the tins could have gone better though. In hindsight, lining the bases with baking parchment would have been a good idea.

So I won't win any awards for prettiness with this cake. I might have slightly run out of patience while waiting for the cake to cool...


Actually though, the finished product doesn't look that bad really!


It's a Victoria sponge. Not the most exciting cake in the world, but it's become a classic for a reason. I think Victoria sponges get a bit of a bad rep because of the terrible supermarket versions - they're always pretty, but inevitably dry, bland and disappointing. This one is almost the exact opposite - not even remotely neat, but it's almost succulent. The sponge is moist, and the vanilla really comes through. The jam gives a nice zing (the gooseberry gives a bit more interest flavourwise than strawberry would have), while the fresh cream just smooths it all over. A Victoria sponge will never be my favourite cake, but a good edition is still worth baking. This one is a pretty decent one, I'd say!

Monday, 2 May 2016

Bank holiday baking

It's a bank holiday! I've completed my DIY projects for the long weekend, which means that it's definitely time to get baking :o). Today's recipe: Snickerdoodles. It's essentially this one from Serious Eats, but without coconut oil (so in effect, it's crossed with this recipe).

Snickerdoodles
Ingredients
For the biscuits:
  • 40g Unsalted butter
  • 160g Salted butter*
  • 200g Caster sugar
  • 100g Granulated sugar**
  • 1 1/2 tsp Vanilla extract
  • 1 Egg
  • 1 tsp Baking powder
  • 325g Plain flour
For the coating:
  • 60g Caster sugar
  • 10g(!) Ground cinnamon
Method
  1. Cream the butter and sugar together until fluffy.
  2. Beat in the vanilla extract and egg.
  3. Incorporate the baking powder and flour.
  4. In a separate bowl, mix the caster sugar and cinnamon together.
  5. Roll the dough into 2-3cm diameter balls and coat in the sugar/cinnamon mix.
  6. Flatten slightly onto a baking tray and bake at 200C for 5 minutes then reduce temperature to 175C and bake for a further 5 minutes.
  7. Sprinkle with some of the leftover sugar/cinnamon mix. Allow to cool on the tray for a few minutes before moving.

*In case you hadn't already guessed, I ran out of butter and had to make do with what they had in the corner shop at the end of my road, which meant salted butter. Happily though, the salted butter is 2% salt, which means that this is effectively ~3g salt; pretty much what I would have added separately.
**Yes, I ran out of caster sugar as well. How did you know?

Apparently, I've angered the gods of baking recently. Apart from the (not altogether unusual) running out of key ingredients, my usual kitchen scales threw a bit of a fit and started reading around half the correct weight. Happily, I did notice, but not before thinking that I'd been cheated by the corner shop and bought a "200g" block of butter that only weighed 100g... (I've since removed the batteries and put them back in and now my scales are back to normal).

Here are the balls of dough before coating. Obviously, I didn't bake them this close together on the trays. Don't they look satisfying?


Ready for the oven. I thought I'd try a little experiment - the bottom right tray have an extra dusting of the sugar/cinnamon mixture, while the other two trays only had as much as would stick to the dough.

 I have got to get myself some bigger baking trays! But don't they look good? The ones with extra dusting have come out a little darker than the others, but aren't burnt. I think they're pretty gorgeous personally!

But as ever, what counts is how it tastes. While still warm from the oven, I snaffled my first taste - they've got a lovely texture - a great outer crunch coupled with a melt-in-the-mouth soft interior - and the cinnamon tastes great! The actual dough itself is (unsurprisingly) bland though, so it's all about the cinnamon on the outside. There's surprisingly little difference between the ones where I put an extra (thin) layer of sugar/cinnamon on the top before baking, but they're really helped by the post-baking sprinkle.

Truth be told though, I think they're actually too rich. The biscuits are so butter-and-sugar-heavy, you start feeling slightly queasy after only one and a half of them. They're nice - actually a bit better once they've cooled and are a bit firmer - but just a bit too buttery for my tastes. I suspect they'll go down a storm in the lab tomorrow though!

Sunday, 7 February 2016

Simple oat raisin cookies

Urgh. I'm ill and feeling a bit sorry for myself this weekend. I also fancy some cookies, but I'm thinking I should branch out a bit from my regular cookies. Of course though, feeling under the weather also means that I can't be bothered to do anything that would require very much faff at all - so simple is the name of the game. The inspiration came from this recipe, though it's hardly anything out of the ordinary.

Simple Oat Raisin Cookies
Ingredients
  • 100g Plain flour
  • 1/2 tsp Baking powder
  • 100g Porridge oats
  • 50g Caster sugar
  • 75g Sultanas
  • 100g Butter
  • 1 tbsp Honey
  • 1 tbsp Black treacle
Method
  1. Mix flour, baking powder, oats, sugar and sultanas together.
  2. Melt the butter, honey and treacle together, then stir into dry ingredients.
  3. Roll into small, squashed-meatball shapes, place onto a lined tray and bake at 180C for ~15 mins.
Here's the mixture before forming. As you can see, it's rather crumbly, so you need to press the mixture together just like you're making meatballs.


Fresh from the oven. I find it quite hard to tell how cooked oat cookies are, and I think I may have ever-so-slightly overdone them.


I tried so hard to get all of them to fit onto my cooling rack. I think I might need to get a bigger rack!

They do look good though, don't they?

Well, I needn't have bothered trying to cram them all onto the cooling rack - the four that didn't fit (and several more to boot) were devoured in an instant (not just by me, I hasten to add; Fiona did help!). These were just about everything that I had hoped for - slightly crunchy, deliciously chewy and just the right amount of crumbly. There's a wonderful hint of toffee from the sultanas, and a rich, dark after taste from the treacle. These are very good cookies - probably not right up at the top of my list, but when you factor in how easy they are to make, they definitely warrant another go at some point. Perfect for a lazy Sunday afternoon in the conservatory with Radio 4 and a cup of tea! We'll see how they are once they cool down, but fresh from the oven, they're pretty wonderful!

Sunday, 31 January 2016

Those crazy Canadians

Over the Christmas break, Rachel drew my attention to the fact that Heinz publishes a recipe for a tomato ketchup cake. Naturally, I had to give it a go! The recipe is pretty much as published by Heinz, except for the omission of food colouring and substituting the bicarbonate of soda with extra baking powder.

Tomato Ketchup Cake
Ingredients
  • 170g Butter
  • 125g Soft brown sugar
  • 205g Caster sugar
  • 2 Eggs
  • 250g Plain flour
  • 4 tsp Baking powder
  • 1 1/2 Teaspoons cinnamon
  • 1/2 tsp Ground nutmeg
  • 1/2 tsp Ground ginger
  • 125 ml (185g) Tomato ketchup
  • 125 ml Water
Method
  1. Cream the butter and sugar together.
  2. Beat in the eggs.
  3. Incorporate the flour, baking powder, cinnamon, nutmeg, ginger, ketchup and water.
  4. Pour into two greased 23cm sandwich tins and bake at 180C for ~30 mins.
Looks like any other cake batter. It does smell oddly (though unsurprisingly) ketchupy though...


Whoops. I may have added too much baking powder.

Not perfect, but they look like cakes. It's slightly over-baked on top, but not burnt.

But they were stuck fast to the tins! I really shouldn't have been so lazy - I greased, but didn't flour the tins. Annoyingly, I had thought about it, but decided that it'd probably be okay without it. I was wrong!

Not a terribly pretty result, I'll admit. It looks better if you turn it the other way up though.

So, the important question: How did it taste? First off - disappointingly, the cake really doesn't taste of ketchup at all. (I seem to be in the minority of people in that I think "disappointingly" is the correct word there - a much more commonly held opinion is that "thankfully" would be a better choice...). But it was actually rather good. Nicely spiced, very moist in texture. The over-baked top turned into a wonderful, crunchy, caramelised top somewhat reminiscent of brandy snaps, while the inside was lovely and soft. The non-ketchup flavours (nutmeg, cinnamon and ginger) are a classic combination and that is what really comes through in this cake. The original recipe suggested sandwiching and icing the cakes, but I would suggest that that is neither necessary nor a good idea - the cake is plenty sweet and moist enough on its own.

Overall, it's actually a pretty decent cake - just a little disappointingly normal, that's all!

Sunday, 17 January 2016

Verdict: Yorkshire curd tart

Well, overall it was a little disappointing. It came out of the tin easily enough (and surprisingly, intact!) and looked pretty good. It smelt of nutmeg and custard, which all in all is a pretty promising sign too, but in the end it just wasn't quite right. I definitely overcooked it a bit, and overall it was rather reminiscent of scrambled eggs. There was also definitely too much lemon in the filling, so it tasted a little odd too. Not unpleasant, but not nice either. The pastry was pretty good though - nice and crumbly. Having said all that though, we hadn't waited for it to cool fully, so perhaps it will improve when completely cold. An update will follow!


Update: It's much better cold! It still reminds me a little of scrambled eggs, but the resemblance is much less obvious. Definitely overcooked it a bit, but the flavours have mellowed on cooling, and it's significantly better! Still not one of my best, but definitely not as bad as I had initially thought.

Curd cheese != cheese curds

In a moment of idiocy, while out shopping last week, I bought a tub of curd cheese when I really wanted to get some cheese curds (which I still haven't found a source for). Somehow, I managed to do this without registering that it doesn't even remotely resemble cheese curds until I got it home and opened the tub. So I've got a tub of curd cheese that needs to be used, which means that it's time to bake! I've never baked a curd tart before, but I have eaten them and very much enjoyed it before, so time to give it a go. I'm essentially using this Paul Hollywood recipe, with omissions and substitutions as needed such that I don't need to go out to the shops! There were supposed to be sultanas in there (as a substitute for the currants), but I completely forgot to add them :o(.

Yorkshire Curd Tart
Ingredients
For the pastry
  • 150g Plain flour
  • 2tbsp Caster sugar
  • 75g Unsalted butter
  • 1 Egg yolk
  • 1/2 tsp Lemon juice
For the filling
  • 50g Caster sugar
  • 225g Curd cheese
  • 2 Eggs
  • 2 Egg yolks
  • 1tsp Lemon juice
  • 25g Butter, melted
  • 1tsp Vanilla extract
  • 1/2tsp Nutmeg
Method
  1. Rub the butter with the flour and sugar for the pastry together until it resembles breadcrumbs.
  2. Add the egg yolk, lemon juice and a tablespoon of water and form into a dough. Wrap in cling film and rest in the fridge for 15 mins.
  3. Roll out to 3mm thick, line a 20cm tin, weigh down with baking beans and bake blind at 200C for ~20-25 mins.
  4. Beat the sugar, curd cheese, eggs, egg yolks, lemon juice, melted butter and vanilla extract together.
  5. Pour the mixture into the tart case and grate the nutmeg over the top of the tart.
  6. Bake at 180C for 20mins until filling is just set.
  7. Allow to cool fully in the tin before removing.
Probably one of my better attempts at rolling pastry out. There are a few cracks appearing that will probably need patching, but not too bad overall!

 The filling isn't the most exciting thing to look at, but it does look like it'll be pretty tasty.

The tart case after blind baking. Not too bad, but I think this illustrates quite neatly why I won't be competing in the Great British Bake Off. In fact, the next time one of my friends asks me why I don't enter, I might just direct them to this very photo!

A little bit of patching later, it's not the prettiest tart case in the world, but hopefully it'll hold together well enough...

Ready for the oven! I very nearly lost my fingertips to the grater, as I finished off a nutmeg. I think it looks pretty nice though!

Ready to eat (nearly - it just needs to cool down). I think I may have over baked it slightly, but I decided that having a slightly solid curd tart would be better than a liquid one.


Saturday, 24 October 2015

Verdict: Cinnamon rolls

In a word: Amazing. They say that the best seasoning is "hunger". After tasting these,  I'm starting to think that maybe butter and sugar might just give hunger a run for its money.

To give you an idea of quite how amazing these are, I had originally intended to take a photo partway through one of the rolls so that you could see the inside of it - but I just couldn't stop eating it, and devoured it instead. They're everything a cinnamon roll should be. Buttery, soft, buttery, sweet, buttery, a little gooey... did I mention buttery? Oh so good, but I've just eaten two in quick succession and they're so rich that I couldn't eat another. At least not quite yet. They're not in the slightest boozy (which makes me wonder if I might have been better off plumping the sultanas up in juice, rather than gin), and not nearly as sickly sweet as most cinnamon rolls are. The inner sections are, unsurprisingly, definitely better than the ends. Less obviously, the inside edges of the block are also better than the exposed edges - I had expected the edges to do some lovely caramelisation magic, but really you get that on the top of every roll, and the outer edges are just a bit drier rather than the wonderfully soft inners.

We'll have to wait and see how they are once they've cooled down, but straight from the oven, these are absolutely magical. Well worth the wait!

Update: Obviously, they're not as good when they've cooled, but they're still pretty darned good. I suspect they'll reheat passably in the oven, though I'm usually too lazy to bother...

Update 2: 20 seconds in the microwave reheats them beautifully!

Everyone loves cinnamon

At least I think everyone does, don't they? But more importantly, I like cinnamon. For quite a while now, I've been thinking about trying to bake cinnamon rolls. They're so wonderfully indulgent, usually a little too sweet and always obviously-unhealthy-in-the-tastiest-possible-way. Well, now that I've got a decent oven, there's no time like the present! After reading through rather a lot of variations on the theme, my recipe is cribbed from this one, but with the usual fiddling around the edges. I don't actually know if that recipe is a good starting point or not, but I think it looks pretty solid.

Cinnamon Rolls
Ingredients
For the dough
  • 450g Strong white flour
  • 1tsp Salt
  • 50g Caster sugar
  • 1 sachet (7g) Fast action dried yeast
  • 75g Butter
  • 220g Milk
  • 1 Egg
For the filling
  • 150g Sultanas
  • 150g Gin
  • 100g Butter
  • 100g Caster sugar
  • 3tsp (~5g) Ground cinnamon
  • 1 Egg
For the glaze
  • 50g Caster sugar
Method
  1. Pour the gin over the sultanas and allow to soak.*
  2. Mix the flour, salt, sugar (for the dough) and yeast together in a mixing bowl.
  3. Rub in the butter (for the dough).**
  4. Make a well in the centre of the mixture and pour in the milk and egg (for the dough). Mix gently to form a dough.
  5. Turn the dough out onto a clean surface and knead until smooth and elastic.
  6. Place dough into a greased bowl, cover with a damp teatowel and leave to rise for ~90mins.
  7. In another mixing bowl, beat the butter (for the filling) with the sugar (for the filling) and cinnamon until well combined into a paste.
  8. Once the dough is done rising, knock the air out of it, tip onto a clean surface and spread out into a rectangle between A4 and A3 in size, a few millimetres thick (the original recipe suggested aiming for the thickness of a one pound coin).
  9. Spread the cinnamon/sugar/butter paste over the entire rectangle, covering it right to the edges.
  10. Drain the sultanas (setting aside the gin) and sprinkle evenly across the dough.
  11. Roll the dough up in the direction of the short side, then cut into 12 even pieces.
  12. Lie the slices down (cut sides down) in a lined roasting tin, cover with a damp teatowel and leave to prove for ~45mins.
  13. Beat the remaining egg and brush the tops of the rolls.
  14. Bake at 200C for ~10 mins, then turn oven down to 180C and bake for a further 20 mins.
  15. Heat the gin drained from the sultanas with the sugar (for the glaze) in a saucepan, stirring until dissolved. Simmer gently and reduce down to a few tablespoons of volume.
  16. Brush the syrup over the rolls as soon as they come out of the oven, then transfer them on to a wire rack to cool.
*Rum would have been more conventional (and probably would have worked better) but I didn't have any rum in stock, so I used gin instead. I used Tanqueray, but I don't think it would make a huge difference if I'd used any of the other gins from my cupboard. In hindsight though, I should have used kirsch or cherry brandy instead of gin, both of which I did have on my shelf.
**I actually managed to forget to do this step, and so had to rub the butter in together with the milk and egg. I don't think it will make any significant difference, but it was certainly less easy than it would have been if I'd not been so absent-minded!

This has certainly not been a fast recipe to make - I started baking at around 2:30pm this afternoon, and they eventually went into the oven just after 7pm! But it's been a lot of fun, and watching the two rising processes has been so satisfying!

Here's the cinnamon/sugar butter paste. It doesn't look all that appetising at this point, I must admit. Also, you probably want to use a bigger bowl for this than I did...

I'd forgotten how easy leavened doughs can be if you use white flour and packaged yeast! Look how well the first rise went!

As you can see, I'm not very good at rolling stuff out into neat rectangles.

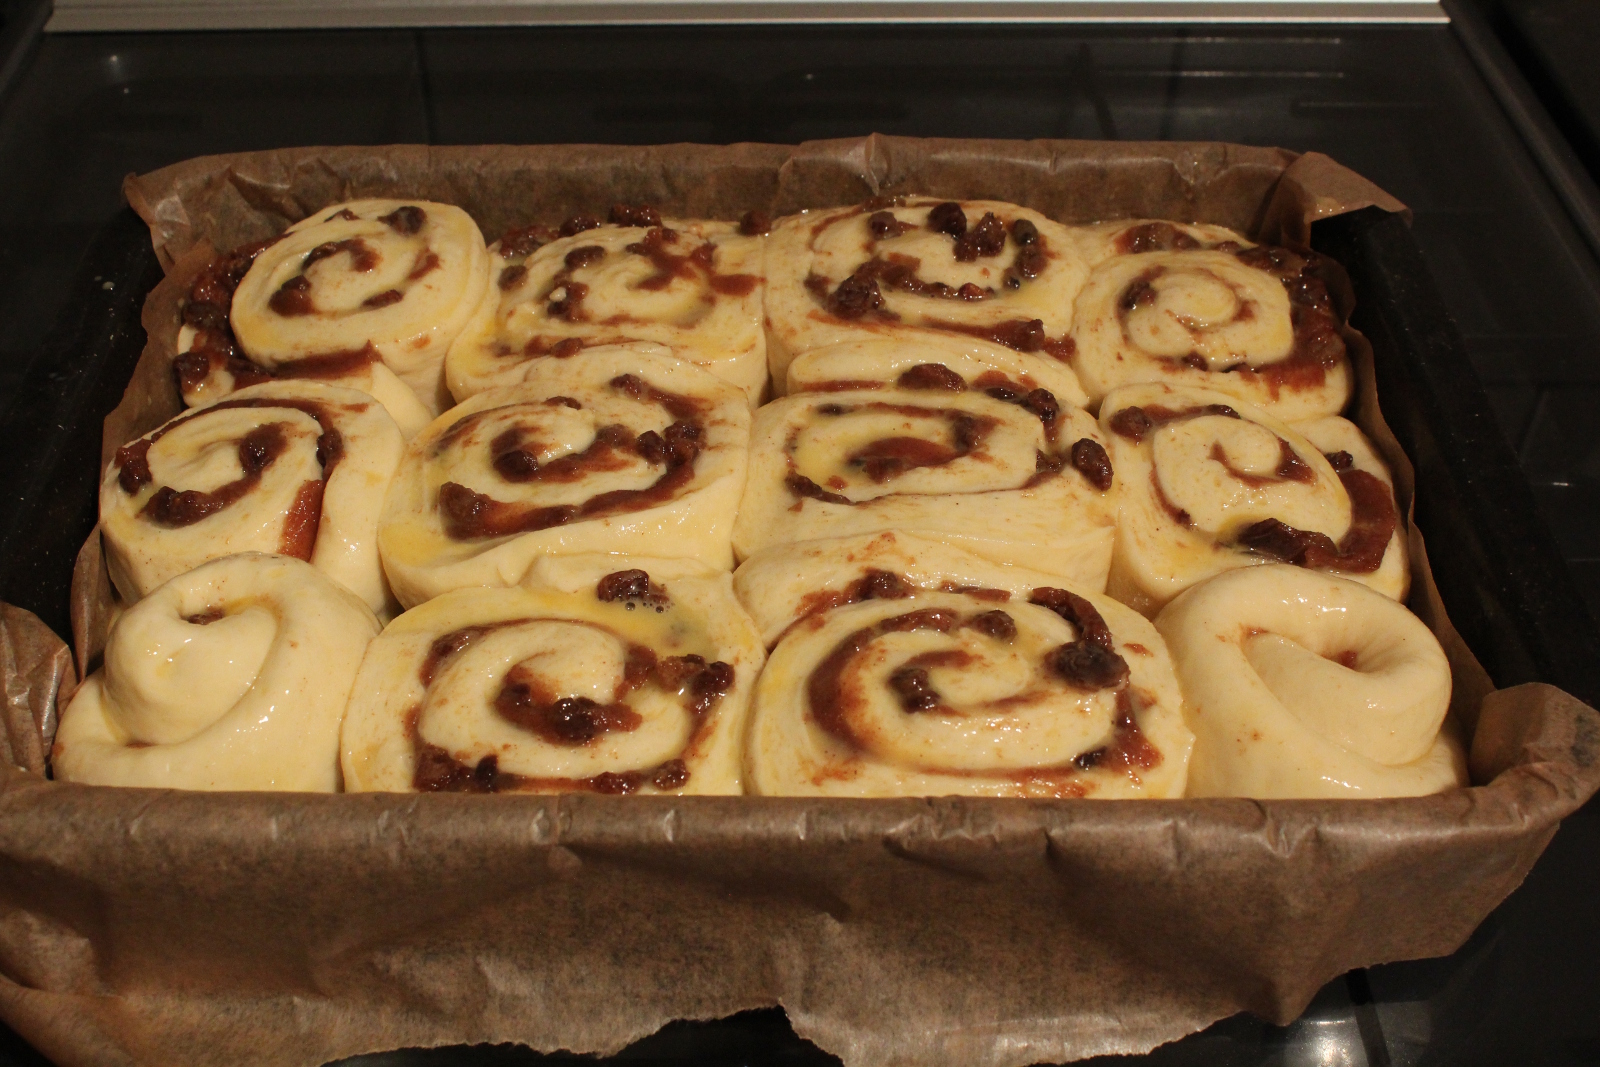
Now just try to tell me that that doesn't look good!

Ready for the prove. I'm expecting (and hoping) that these will rise and expand and stick together slightly to form one large tasty gooey mass!

Wow, don't those look good? They've proved so well and squidged together just as I'd hoped. Here they are ready for the oven after a quick egg wash.

I've just turned the oven down, and I can't quite get a photo that does justice to how good they look! I'm a little concerned by how brown the top has got already, but I'm hoping that it'll still turn out nicely anyway.

This is how much I reduced the glaze down to.

Fresh from the oven, they look even better than I'd hoped!

And better still after being glazed.


Just look at the insides!

Sunday, 11 October 2015

A proper test

We may have christened the oven with the ginger treacle biscuits, but it's time to give it a proper test. How do we do that? Well, how else but baking some bread. It's been a long, looooong time since I've made any bread, and Aage's been getting bored. So no time like the present! I made up a standard batch of wholemeal sourdough bread dough (500g wholemeal flour, 300g water, 10g salt, ~10g olive oil, half of Aage) and then split it into two so that Fiona could knead one and I could knead one.

Ready for the oven - mine's the one on the left, Fiona's is the one on the right.

Fiona's getting excited! (And a little impatient too...)

Don't they look gorgeous?


All in all, a success! The oven performed beautifully, and I can still remember how to bake bread. And Aage was as brilliant as ever too :o).