Monday, 24 March 2014
Verdict: An edible bribe
It turns out that Kathryn is working from home this week, so I couldn't give her her cake. So instead, we (the post-docs) ate it instead. And actually, it was quite a lot better than I'd thought - yes, it wasn't exactly an inspiring cake, but it was good. I overdid the chocolate a bit, but not horrifically so, and there was enough banana in it to give it a subtle fragrance, so all in all, it was a pretty decent cake. Nothing terribly exciting, I'll grant you, but enjoyable at least.


Sunday, 23 March 2014
Bribery
There are a lot of problems with bribery around the world. There are so many corrupt officials, corrupt police and corrupt politicians, that even when it happens in western Europe where it's not nearly as prevalent in other parts of the world, people are so used to it that they either don't ask questions, or fail to ask the right ones. And here's one of those burning, never-asked questions: Why doesn't anyone ever seem to be caught accepting a bribe in the form of cake? I think it's evidence that this is a sure-fire way to dodge the law, and it's a way to offer (and accept) bribes without any risk of being caught.
I'm in a position where I need to bribe our workshop technicians and our lab secretary into helping me get stuff done quickly, so what better than a banana and chocolate cake?!
An Edible Bribe
Ingredients
(This will make two cakes - halve the amounts to make a single cake!)
For the cake
 Okay, it just looks like cake batter as it waits for the oven, but I think it looks pretty good!
 Out of the oven, it's not terribly spectacular either. The top was a little over done, but not horrendously so. I snaffled a bit of one of the cakes that got stuck to the tin; it's pretty non-descript and not horrendously inspiring. But then it's freshly baked, home-made cake, so it's pretty good still, just also a bit boring.
 Every cake is pretty if you cover it with ganache :D

I'm in a position where I need to bribe our workshop technicians and our lab secretary into helping me get stuff done quickly, so what better than a banana and chocolate cake?!
An Edible Bribe
Ingredients
(This will make two cakes - halve the amounts to make a single cake!)
For the cake
- 350g Butter
- 350g Caster sugar
- 5 Eggs
- 1tbsp Vanilla extract
- 3 Large bananas (375g peeled weight)
- 375g Plain flour
- 4 tsp Baking powder
- 250g Chocolate chips
- 300ml Double cream
- 400g Dark chocolate
- Cream the butter and sugar together.
- Beat in the eggs and vanilla.
- Mash the bananas in a separate bowl, then beat into the cake mixture.
- Fold in the flour, baking powder and chocolate chips.
- Pour into two greased loaf tins and bake at 180C for 1 hour.
- Turn out onto a rack to cool.
- Heat the cream to scalding point in a pan.
- Pour the hot cream over the chocolate and stir until the chocolate has melted.
- Allow the ganache to cool slightly to allow it to thicken. Smooth the ganache over the cakes and leave to set.
Sunday, 9 February 2014
Verdict: Banana bread

Banana bread
I've had a hankering for banana bread for the last couple of days, so I thought I'd bake some. There's nothing particularly special about the recipe, but you can't go too far wrong with banana bread in my opinion! I had intended to add some honey to it, but completely forgot, so that'll have to wait until next time.
Banana Bread
Ingredients

It came close, but didn't quite overflow!

Looking good!


Banana Bread
Ingredients
- 100g Butter
- 200g Caster sugar
- 3 Eggs
- 2tsp Vanilla extract
- 4 Small not-as-ripe-as-I-would-have-liked bananas (350g peeled weight)
- 240g Plain flour
- 1tsp Baking powder
- 1/2tsp Nutmeg
- Cream the butter and sugar together.
- Beat in the eggs and vanilla.
- Mash the bananas and beat in.
- Sift the remaining ingredients in and incorporate.
- Pour into a greased loaf tin and bake at 180C for ~1 hour.
It came close, but didn't quite overflow!
Looking good!
Sunday, 19 January 2014
Verdict: Cola cookies
Well... it's a bit of a failure, but not an unmitigated one. Let's start with a positive: It actually tastes of cola. I'd been somewhat worried that the flavour would be entirely lost in the baking, but it does definitely come through. The cookies were slightly over done, partly because looking at them as they baked, the melted bits of cola bottles looked like uncooked dough, so I erred on the side of caution and baked it for a bit longer. That meant that the bits nearer the edges of the trays (actually, this was most of it really) went pretty hard and crunchy, while only the bits in the very centre of the tray were cookie-like in texture. I should say though, the hard and crunchy bits aren't unpleasant at all - the texture is very similar to brandy snaps - it's just not what I would have preferred. Interestingly, the cookies were very chewy as well (even the hard bits) - I suspect that the smaller bits of cola bottles melted and effectively became part of the dough.
So overall, they are pleasant, but definitely not quite what I had been aiming for. Before doing this, I had thought that cola cupcakes would work better (but I decided that I couldn't be bothered to do cupcakes, which is why they became cookies - or at least biscuits...), and I still think that that's probably true. Maybe I'll get around to trying it at some point, but I wouldn't hold your breath!
So overall, they are pleasant, but definitely not quite what I had been aiming for. Before doing this, I had thought that cola cupcakes would work better (but I decided that I couldn't be bothered to do cupcakes, which is why they became cookies - or at least biscuits...), and I still think that that's probably true. Maybe I'll get around to trying it at some point, but I wouldn't hold your breath!
Good things come in small packages
I stumbled across a recipe for root beer float cookies on Reddit yesterday. Now, as a non-American, I am firmly of the opinion that root beer has got to be some trick that the entirety of the US are trying to play on the rest of the world, where they pretend that it's some really nice, wonderful confection in the hope of tricking unsuspecting people into trying it, so that they can then point and laugh. It tastes like Germolene, for crying out loud. But, this recipe had what I think might be one of those strokes of absolute genius that seems so obvious, you wonder why you never thought of it yourself - namely, using root beer concentrate instead of actual root beer for flavouring. So this morning, I went and bought some Sodastream cola syrup, and we'll see how this one turns out!
Cola Cookies
Ingredients
*Don't be fooled by the fact that this instruction is so short! This is non-trivial. Sharp knives don't work at all - you need a pair of kitchen scissors. Cola bottles are the stickiest things in the world, so they just stick to the side of the knife, and making more than one cut without clearing the blade is utterly impossible. Pro tip: weigh out the flour first and chop into the pile of flour, so the flour kills the stickiness of all the chopped edges.
If, like me, you've never owned or used a Sodastream before, you might be wondering what the syrups are actually like. Well, it turns out that the cola syrup is a fairly runny syrup, and tastes (prepare yourself for this revelation) like very, very strongly flavoured and very, very sweet cola. Duh. It's actually quite pleasant if you just have a few drops on a spoon, though you certainly wouldn't want to drink it neat. I guess that's why you're supposed to water it down... (again, duh!)

It's not looking terribly appetising yet (end of step 2).

Ready for the oven. I'm fully aware that these are likely to spread out and amalgamate into a single giant cookie per tray, but I don't have any more trays! I had intended to bake a half-quantities batch first, especially as this is definitely an experiment, but I only remembered after I started creaming the flour and sugar together and thought "This looks like quite a lot.". Whoops

Yup, they spread out as expected. Actually, more than expected - they've gone incredibly thin.

Mental note, next time let them cool a bit more before trying to get them off the tray.

The finished article!


Cola Cookies
Ingredients
- 115g Butter
- 300g Soft brown sugar
- 1 Egg
- 3tbsp Sodastream cola syrup
- 175g Plain flour
- 1/2tsp Baking powder
- 80g Cola bottles
- Cream the butter and sugar together.
- Beat in the egg and cola syrup.
- Chop up the cola bottles*.
- Add the cola bottles, flour and baking powder and mix into a soft dough.
- Spoon blobs onto greased/lined baking trays and bake at 190C for ~8mins.
*Don't be fooled by the fact that this instruction is so short! This is non-trivial. Sharp knives don't work at all - you need a pair of kitchen scissors. Cola bottles are the stickiest things in the world, so they just stick to the side of the knife, and making more than one cut without clearing the blade is utterly impossible. Pro tip: weigh out the flour first and chop into the pile of flour, so the flour kills the stickiness of all the chopped edges.
If, like me, you've never owned or used a Sodastream before, you might be wondering what the syrups are actually like. Well, it turns out that the cola syrup is a fairly runny syrup, and tastes (prepare yourself for this revelation) like very, very strongly flavoured and very, very sweet cola. Duh. It's actually quite pleasant if you just have a few drops on a spoon, though you certainly wouldn't want to drink it neat. I guess that's why you're supposed to water it down... (again, duh!)
It's not looking terribly appetising yet (end of step 2).
Ready for the oven. I'm fully aware that these are likely to spread out and amalgamate into a single giant cookie per tray, but I don't have any more trays! I had intended to bake a half-quantities batch first, especially as this is definitely an experiment, but I only remembered after I started creaming the flour and sugar together and thought "This looks like quite a lot.". Whoops
Yup, they spread out as expected. Actually, more than expected - they've gone incredibly thin.
Mental note, next time let them cool a bit more before trying to get them off the tray.
The finished article!
Monday, 13 January 2014
Verdict: Phoenix cake
In a word: Brilliant! My confidence last night was vindicated - it turned out absolutely wonderfully. Moist, dense, spongy and chewy. Not too sweet, but definitely sweet enough, and very, VERY orangey. The thick bits of peel from the marmalade really made the cake, but it was an all-round good cake. Actually, it was an all-round great cake - I was really pleased with this one!
Sunday, 12 January 2014
Phoenix cake
We're back! Or rather, I'm back, as despite my best efforts, there's still only one of me. Even the most irregular reader will have noticed that it's been a little while since I last did any baking. It's been a bit of a busy, not terribly fun past year. But just as the phoenix rises from the ashes of its previous incarnation, this blog has returned... with cake! And yes, that tenuous premise is the only reason why this cake is called Phoenix Cake.
Phoenix Cake
Ingredients
For the cake

Straight from the oven, and things are looking good! It's fallen, so clearly too much baking powder, but otherwise it's looking pretty good.


And look at the underside! I just want to dig into it straight away! It's gooey and sticky and moist - kinda like the texture of a sticky toffee pudding.

Gorgeous colours in the glaze-to-be. This is quite early in the reduction, so it's still quite liquidy here.

Finished! I will confess that while I was planning this cake before I started actually started baking it, I was pretty nervous about it. It'd been so long since I had baked a cake, I was worried that I might have forgotten how to, or lost my touch with it. Well, we'll find out for certain tomorrow when I bring it in to the lab to share, but I think it's looking like a pretty solid comeback :o).


Phoenix Cake
Ingredients
For the cake
- 175g Butter
- 85g Soft dark brown sugar
- 85g Caster sugar
- 3 Eggs
- 160g Thick cut marmalade
- Zest of 1 orange
- 200g Plain flour
- 2tsp Baking powder
- Juice and pulp of 1/2 orange
- Juice and pulp of the other 1/2 orange
- 100g Marmalade
- Cream the butter and sugars (both types) together until fluffy.
- Beat in the eggs one at a time.
- Beat in the marmalade and orange zest.
- Fold in the flour, baking powder.
- Stir in the orange juice.
- Pour into a greased loaf tin and bake for ~40 mins at 180C.
- Heat the orange juice and marmalade in a pan and reduced down to a syrup.
- Poke holes in the top of the cake with a skewer then pour the syrup over the cake.
Straight from the oven, and things are looking good! It's fallen, so clearly too much baking powder, but otherwise it's looking pretty good.
And look at the underside! I just want to dig into it straight away! It's gooey and sticky and moist - kinda like the texture of a sticky toffee pudding.
Gorgeous colours in the glaze-to-be. This is quite early in the reduction, so it's still quite liquidy here.
Finished! I will confess that while I was planning this cake before I started actually started baking it, I was pretty nervous about it. It'd been so long since I had baked a cake, I was worried that I might have forgotten how to, or lost my touch with it. Well, we'll find out for certain tomorrow when I bring it in to the lab to share, but I think it's looking like a pretty solid comeback :o).
Sunday, 28 April 2013
Pirates would approve
Trisha and I had a group of my old labmates over this afternoon for Sunday lunch and board games. As I was being particularly lazy and buying lunch (Waitrose certainly turned up the goods!), I was especially keen to bake dessert so that the meal wasn't entirely shop bought. A little browsing through cook books and websites turned up the inspiration I needed - rum and raisin banana bread! So, without further ado, here's the recipe, which is based on this one that I found online.
Rum and Raisin Banana Bread
Ingredients


 I'm really pleased with this one! It was lovely and moist, wonderfully flavourful and rather alcoholic - but the alcohol really wasn't just a novelty, it definitely added to the flavour and helped balance the cake out. I'd suggest that this is one to do with reasonably decent rum though - I think it'd be much less nice if you baked it with Bacardi, for instance. But it went down very well and several people even had seconds! This was definitely a good cake!
Rum and Raisin Banana Bread
Ingredients
- 150g Raisins
- ~150-200ml Rum
- 200g Caster sugar
- 175g Butter
- 3 Eggs
- 1tsp Vanilla extract
- 4 Small bananas
- 250g Plain flour
- 1tsp Bicarbonate of soda
- 1tsp Cream of tartar
- 4tbsp/60ml Milk
- 100g Chopped walnuts
- Put the raisins in a bowl and cover with rum and leave for ~1hr to allow the raisins to plump up.
- Cream the caster sugar with the butter.
- Beat in the eggs and vanilla extract.
- Mash the bananas.
- Add the flour, bicarbonate of soda, cream of tartar and mashed bananas into the mixture a little at a time, beating to incorporate.
- Mix in the milk.
- Stir in the raisins and walnuts and a little of the rum. Set the rest of the rum aside.
- Pour into two greased 1lb loaf tins and bake at 170C for ~50 minutes.
- Turn out onto a wire rack. Poke holes through the top with a skewer and spoon the remaining rum on top of the cakes to be absorbed.


Saturday, 6 April 2013
It's been a while...
Between a lack of time and a lack of motivation, I don't bake very much any more. Which is a shame, as I still enjoy it, but it does take quite a lot more impetus for me to bake nowadays. But Jen and Julian coming over for dinner tonight is a good enough reason for me! I'm doing a cake that I've already baked twice, but it's a gloriously sunny day and it actually finally feels spring-like, and this cake just feels right for today; plus it's one of my absolute favourites. I'm baking this pear and almond cake - I just hope that my baking skills haven't all vanished in my hiatus!
Sunday, 20 January 2013
And we're back!

Sunday, 22 July 2012
Microwave brownie
Well, it turns out that starting a new job means that I've been kinda busy and haven't had a chance to get back into baking yet. This update's not really a proper one either - but I saw this recipe for microwave brownies and thought it was worth a shot.
Microwave Brownie
Ingredients


So, what's it like? Well, the texture's about right, but it's not nearly chocolatey enough, and the olive oil gives it a slightly weird flavour. It's definitely got potential, but I think it probably needs more cocoa powder, less flour and a switch to sunflower oil. And maybe some chocolate chips too! But it was definitely worth the punt and probably will be worth refining into a better brownie too.
Microwave Brownie
Ingredients
- 4tbsp Plain flour
- 4tbsp Caster sugar
- 2tbsp Cocoa powder
- 2tbsp Olive oil
- 3tbsp Water
- Mix all the ingredients up in a mug until homogenous.
- Microwave on full power for ~1min40.


So, what's it like? Well, the texture's about right, but it's not nearly chocolatey enough, and the olive oil gives it a slightly weird flavour. It's definitely got potential, but I think it probably needs more cocoa powder, less flour and a switch to sunflower oil. And maybe some chocolate chips too! But it was definitely worth the punt and probably will be worth refining into a better brownie too.
Friday, 15 June 2012
Verdict: Chocolate cupcakes
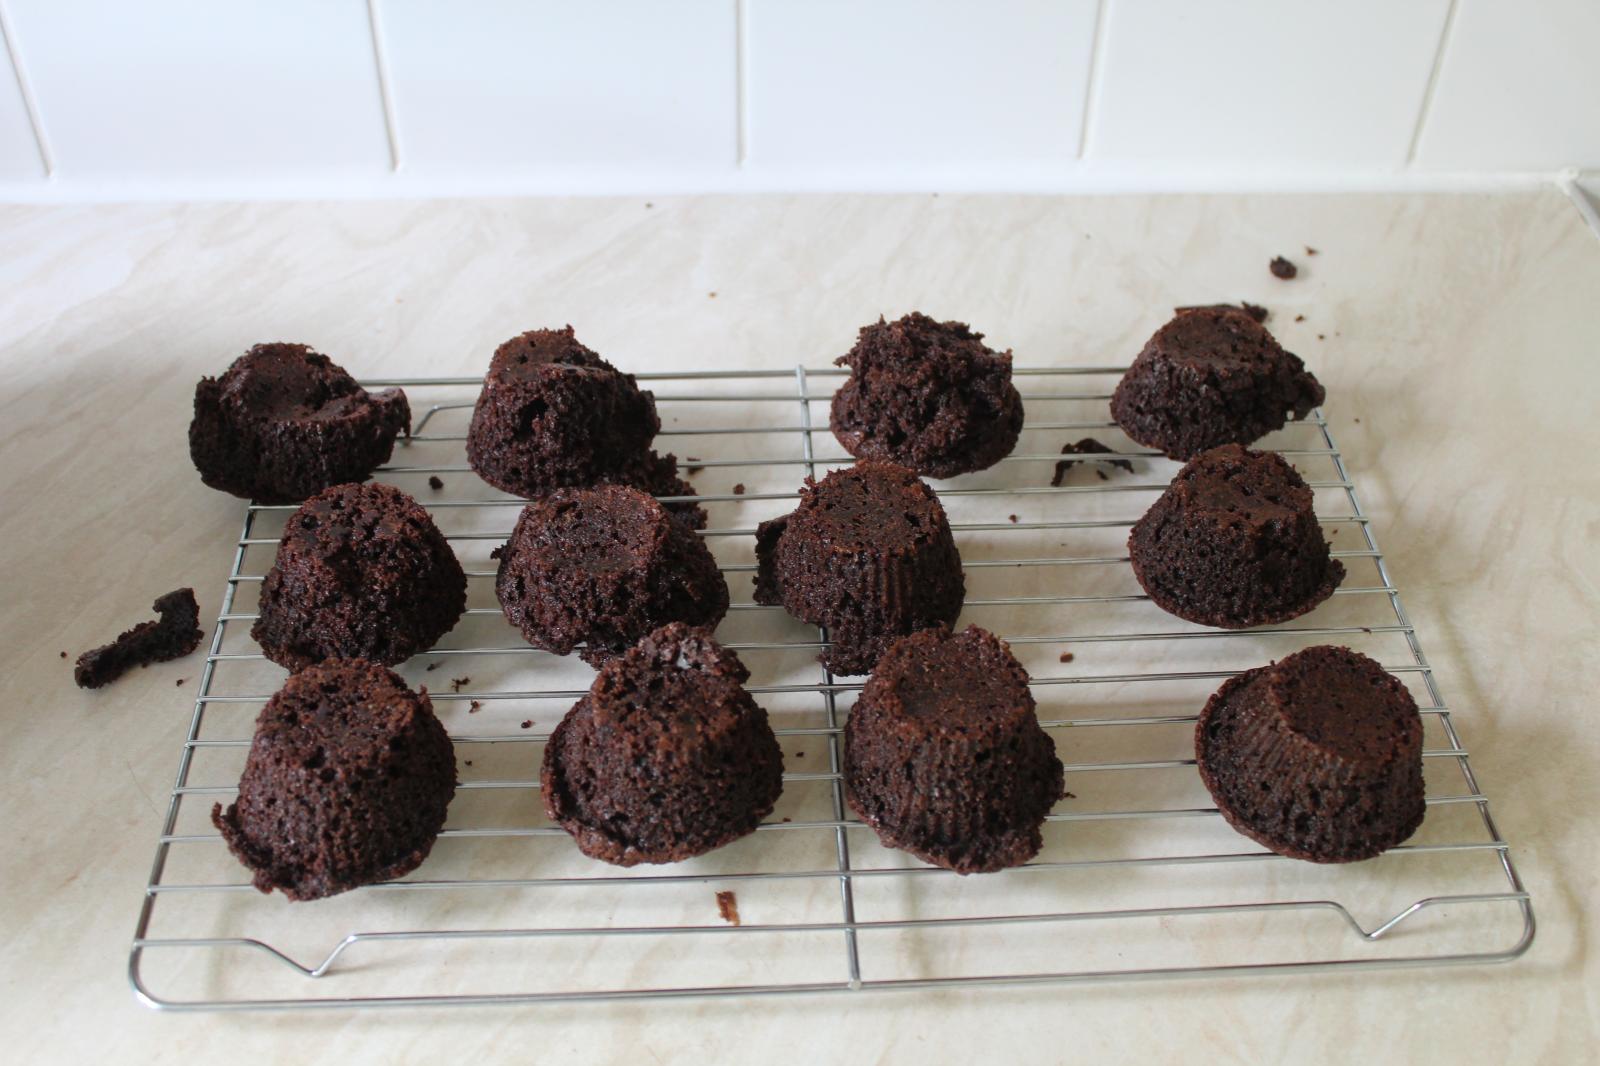
Not the prettiest cupcakes in the world, I'll grant you - but absolutely gorgeous! I baked an extra cupcake to try, and I admit I scarfed it down before it had a chance to cool down. While still hot from the oven, it was soft, moist, chocolatey, sweet - everything that you'd want from a cupcake. I'm certain that they'll still be great once they've cooled, but I didn't manage to test that! This one worked really well!
Cupcakes!
After a decade at Balliol, I'm about to leave for the real world, so I've been busy saying goodbye and thank you to the people who have helped me over the years. The porters are the final group that I'd like to thank, and a batch of cupcakes seem like a good way to express that! The recipe that I'm using is this one, with only the tiniest bit of faffing around the edges.
Chocolate Cupcakes
Ingredients
 Coloured cupcake cases are pretty though!
 Yeah... turning them out of their cases could have gone a bit better.
 The finished article!

Chocolate Cupcakes
Ingredients
- 150g Butter
- 150g Soft dark brown sugar
- 3 Eggs
- 1tsp Vanilla extract
- 115g Plain flour
- 1/2 tsp Bicarbonate of soda
- 1tsp Cream of tartar
- 35g Cocoa powder
- 100g Chocolate chips
- Cream the butter and sugar together.
- Beat in the eggs and vanilla.
- Fold in the remaining ingredients.
- Pour into cupcake cases and bake at 170C for 20-25 mins.
- Turn out onto a wire rack to cool.



Verdict: Mystery coffee cake
The mystery cake was actually quite good! Really rich, as expected, and very dense, but in quite a good way. It reminded me quite a bit of the chocolate ganache cake I baked a few years ago - and having made that connection, I notice that the recipes are actually rather similar! In any case though, it was rich, dark, chocolately and wonderfully dense. A good cake, but not a light one!
Wednesday, 13 June 2012
Mystery cake!
That was a bit of a long, unplanned hiatus - life got a bit busy again! Anyway, we're back for the moment at least. My friend Tracy invited Trisha and me over tonight, mainly so I can bug her husband, Ben, to explain MRI to me - and if that's not worth bringing a cake for, I don't know what is.
I've had a post-it note stuck to the front page of my Filofax for the last age. It's got a quick summary of a recipe for a coffee cake written on it, in my handwriting, written with one of my fountain pens and in the ink I used to run in that pen. The weird thing is though, I've got absolutely no recollection of writing it! I assume that at some point I saw this recipe and thought it looked good or interesting (and in fairness, I do still think it looks both good and interesting) and copied down crib notes intending to bake it at some point. Unfortunately, because of this, I have no idea where the recipe came from, so I can't credit the original author properly - sorry! Nevertheless, it's time to bake that mystery cake!
 Mystery Coffee Cake
Ingredients
 The mixture ready for baking. It's wonderfully glossy!
 The finished article, fresh from the oven. It smells wonderful and looks ever so dark and fantastically rich - I think I might let it cool and cover it with a ganache just for that extra level of decadence!


 What the heck, why not? I did cover it with ganache in the end - 200g of 53% cocoa dark chocolate and 150ml of double cream. That's a lot of ganache...


I've had a post-it note stuck to the front page of my Filofax for the last age. It's got a quick summary of a recipe for a coffee cake written on it, in my handwriting, written with one of my fountain pens and in the ink I used to run in that pen. The weird thing is though, I've got absolutely no recollection of writing it! I assume that at some point I saw this recipe and thought it looked good or interesting (and in fairness, I do still think it looks both good and interesting) and copied down crib notes intending to bake it at some point. Unfortunately, because of this, I have no idea where the recipe came from, so I can't credit the original author properly - sorry! Nevertheless, it's time to bake that mystery cake!

Ingredients
- 100g Plain flour
- 200g Caster sugar
- 1 1/2 tsp Bicarbonate of soda
- 1/2 tsp Cream of tartar
- 100g Cocoa powder
- 2 Eggs
- 1tbsp Vanilla extract (yup, that's a lot of vanilla!)
- 60g Olive oil (That was my guess as to how much 75ml weighed - it's a bit low though; more like 65ml)
- 150ml Milk
- 150ml Black coffee
- Sift the dry ingredients into a bowl together.
- Whisk the wet ingredients together with a balloon whisk.
- Pour the wet ingredients into the dry ingredients and whisk together.
- Pour into a lined cake tin and bake at ~180C for 45-60 mins.


Sunday, 11 March 2012
Practice makes perfect...
...but conversely, a lack of practice breeds imperfection. Just baked another standard (but half-quantities) wholemeal sourdough loaf and discovered that I'm not nearly as good at baking bread as I used to be. Hopefully I'll get back into it!
Tuesday, 28 February 2012
Verdict: Apple pie
In short, it was good. Not world beating, but good. I had been a little careless in making the pastry and used a little too much water; I realised it at the time, but it really hurt this pie. The filling was really nice, well balanced for sweetness, and the apples went soft, but not too soft. But it could have done with a bit of apple that just dissolved into a paste as well. If the pastry had been a bit shorter and I'd thrown in some bramley apples as well as the braeburns, and maybe even served it with some vanilla ice cream or custard, this would be really great; as it is, it's just good. Room for improvement then, but in a really tasty way!


As English as apple pie...
The American's might use the phrase "as American as apple pie" a lot, but the apple pie predates the USA by quite a few centuries. Apparently, there's a printed apple pie recipe that dates back to 1381 (a quick Google turns it up easily, but the recipe itself isn't exactly very informative...). In any case, I'm a little ill, which means that I've not left the flat all day and so I've decided to bake! I got a gorgeous new pie dish for my birthday that I've yet to use, so this seemed like a perfect opportunity!
Apple Pie
Ingredients
 Ready for the oven. I would have crimped the edge, but I didn't leave myself enough overhang.
 Straight out of the oven. Looking good...

And ready for eating!

Apple Pie
Ingredients
- 180g Plain flour
- 85g Butter
- ~2tbsp Cold water
- 600g Braeburn apples
- 80g Caster sugar
- 1 1/2 tsp Ground cinnamon
- 1/2 tsp Ground nutmeg
- Rub the flour and butter together until it resembles coarse breadcrumbs.
- Add just enough cold water to form a dough.
- Place the dough in a freezer bag and refrigerate for ~30 mins.
- Roll out 2/3rds of the dough and line a pie dish.
- Peel, core and chop the apples and mix with the sugar and spices.
- Pour the apple mixture into the pastry-lined dish.
- Moisten the crust of the pastry.
- Roll out the remaining dough and place over the pie, pressing around the crust to seal.
- Poke a hole in the top to let the steam escape and bake at 180C for ~45 mins.


And ready for eating!

Saturday, 18 February 2012
Verdict 2: Wasabi and apple ganache
Okay, maybe it wasn't entirely my fault - I tried again (with half
quantities), taking extra care not to overheat the chocolate. It was
fine when I poured it out and definitely hadn't seized, but when I took
it out of the fridge, it had separated out again. It's a shame really - I
think the flavours are really nicely balanced, but I have no idea why
it went grainy. Maybe I'll try adding some cream to act as an
emulsifier sometime, but I think I'll leave this one alone for now.

Friday, 17 February 2012
Back to basics
I've been neglecting Aage. Like all pets, you really ought to play with them once in a while, so it's time for another loaf of bread! It's been a while since I've just done a plain wholemeal sourdough, so I'm just doing a normal, run of the mill (albeit half-size) wholemeal sourdough loaf. I am running a mini experiment though - I've made this a much drier dough than usual, and I'm interested to see how much less moist the end result is. It's not the most exciting experiment in the world, but it should be a useful one!
Verdict: Wasabi and apple ganache
It was absolutely horrible! But I should also rather hastily add that
I don't think this is a flaw of the recipe, but letting the chocolate
seize absolutely ruined any chance of it being nice. The texture was a
really nasty grainy, vile mess. So this was entirely my fault for being
careless - I've not done any chocolate work in quite a while and
completely forgot how fickle it can be. The flavour was actually really
interesting though - it seemed to be nicely balanced and really quite
complex - so I think this recipe has some great potential, if you're not
a muppet. I'll try it again soon (hopefully) and try to be a bit less
stupid... so we'll reserve judgement until then!
Tuesday, 14 February 2012
Wasabi and apple ganache
A while ago, I was given a copy of Adventures With Chocolate by Paul Young. I hadn't got around to trying any of its recipes until now, but they all look absolutely amazing! One in particular caught my eye though, and today seemed like a good opportunity to try it!
Wasabi and Green Apple Ganache
Ingredients
Wasabi and Green Apple Ganache
Ingredients
- 15g Wasabi paste
- 200g Caster sugar
- 250ml Apple juice
- 200g Dark chocolate
- Put the wasabi, sugar and apple juice in a pan and bring to a simmer.
- Simmer for 5 minutes.
- Pour over the chocolate and stir until smooth.
- Pour into ramekins and refrigerate to set.
Sunday, 5 February 2012
Verdict: Spelt sourdough
Well, it's good, but not altogether very different from a normal white loaf baked with regular wheat flour. In fact, there's very little difference that I could discern - it's maybe very slightly chewier, but that's it really. Nice, but nothing special.


Verdict: Lemon meringue cupcakes
Oooh, these are really nice. The batter was indeed a little too thick, so the cupcakes themselves could have been a little softer. But the taste was just wonderfully delicate and perfectly balanced. The lemon curd was tart, but not too sour; the cake was sweet but not overpoweringly so and the meringue was just a wonderful counterpoint to everything else. This is a really nice recipe - though I'm not certain it's entirely worth the faff, it's definitely a good cupcake!


Subscribe to:
Posts (Atom)


