Tuesday 30 November 2021

A very special birthday

Yesterday was a milestone day for a key contributor to my baking. It was 10 years ago(!) that we first said hello to Aage, and he's been a faithful companion ever since. I had hoped to be able to bake a loaf of bread to celebrate his 10th birthday yesterday, but we had been travelling back from a Thanksgiving weekend away with Fiona's family, and I was absolutely exhausted and Aage hadn't been fed. But that very first sourdough loaf ten years ago was made with an overnight rise - so today is still the 10th anniversary of the very first loaf that I baked with Aage. However you cut it though, we're celebrating a decade with Aage!

A Birthday Loaf

Ingredients

For the sponge

  • 175g Aage
  • 150g Warm water
  • 100g Wholemeal flour
For the dough
  • 100g Warm water
  • 300g Wholemeal flour
  • 8g Salt

Method

  1. Mix together the ingredients for the sponge in a mixing bowl and wrap in a bin bag.
  2. Leave in a warm place for ~5 hours.
  3. Add the sponge to all the remaining ingredients and mix to form a dough.
  4. Knead for ~15 minutes, then shape and wrap in the bin bag once again.
  5. Leave to prove for ~1.25 hours.
  6. Preheat oven to 220C with a Dutch oven inside.
  7. Score and place dough in Dutch oven, sprinkling lightly with water.
  8. Bake for 15 minutes.
  9. Remove lid of Dutch oven, turn oven down to 200C and bake for a further 15 minutes.

This one's a bit of a quick, relatively basic loaf. It's actually quite a low hydration bread because I wanted to make it easy for myself given that I was baking on a weeknight. But it's really nice to be baking by hand again - it's been quite a long time!

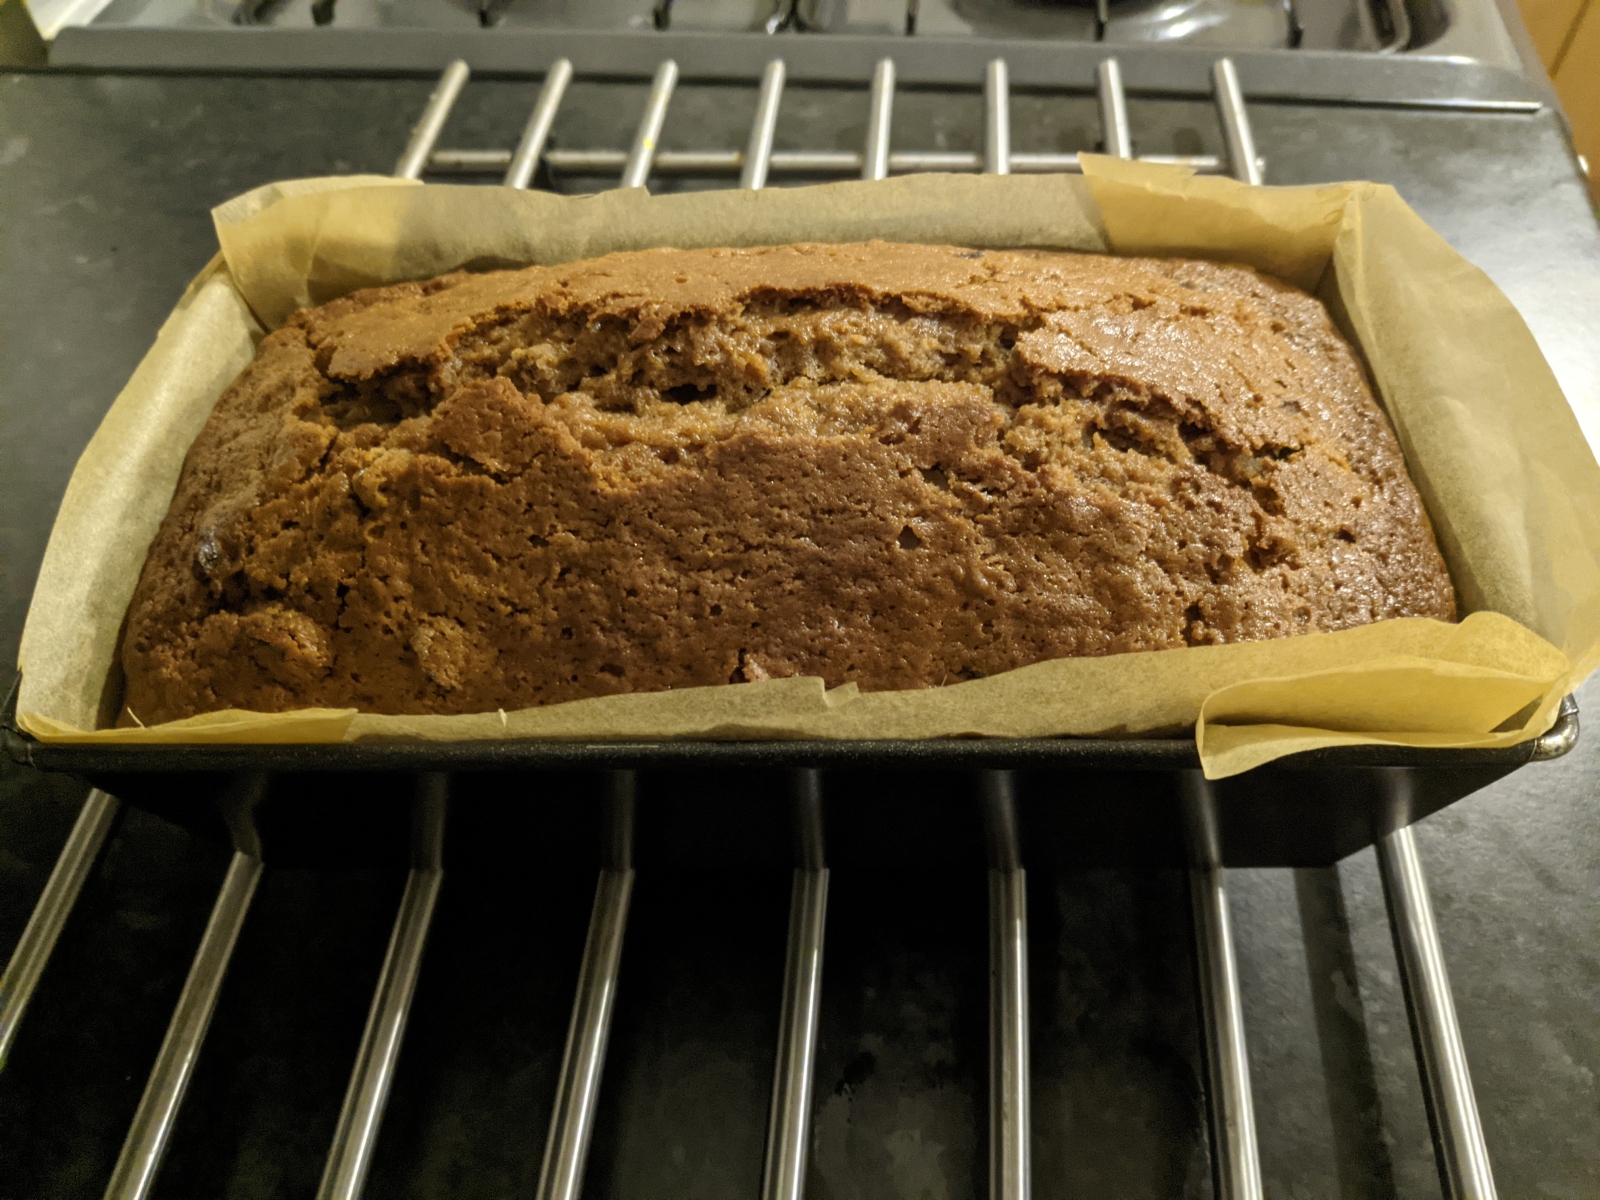
I baked this one on the baking parchment. I still haven't got the hang of scoring my bread...


The cuts opened up nicely, even if they did look rather raggedy before going it went into the oven

I was rushing this one so that we could have the bread for dinner, so this loaf was a bit underdone - I knew it would be, but I was getting hungry and impatient. But it's still not bad - just a little stodgy in the centre. I think it could have done with another quarter hour or maybe even half an hour longer in the oven. But the crust has a lovely texture to it, and there's a great flavour to the bread anyway, so it's not all bad!

Monday 22 November 2021

Baking on a school night?!

Well, I didn't manage to fit cake baking into the weekend, but amazingly I've managed to find time on a Monday night to bake! We're off for a Thanksgiving weekend away with Fiona's family at the weekend, so I thought I'd bake something to bring with us. I decided that the rum cake I made recently would probably go down well - I think the audience will appreciate the booziness - and most importantly it's incredibly easy to make with the stand mixer. I'm only making extremely small changes this time around - I used salted butter in the cake so omitted the salt completely, increased the amount of cornflour to 40g (as it was originally supposed to be), reduced the amount of baking powder to 7.5g and the amount of rum in the cake portion to 150g. There are also going to be a couple of kids coming, so I made the same quantity of rum syrup as before just for the main honeycomb shaped cake (so massively increasing the amount of syrup from last time), and about two thirds of that quantity of syrup without any rum for the round cake alone.

I'm not quite sure what happened this time around, but the cakes seem quite a lot more fragile straight out of the oven than last time. The honeycomb cake broke up quite badly getting it out of the tin.


The finished article - it looks just as obscenely decadent as it did last time around...

Tuesday 5 October 2021

Bara brith

I hadn't even heard of bara brith until stumbling across it online last week, but it sounded fun, tasty and easy! From my brief dive down the rabbit hole, it seems that it's something that's evolved over time, starting off as a yeasted bread with dried fruit into something more cakey. I'm very much doing the latter here, but at some point I might also get around to baking one of the more traditional recipes I found. I'm winging it a bit, but it's essentially a mashup of these three recipes.

Bara Brith

Ingredients

  • 280g Dried mixed fruit
  • 300ml Strong tea
  • 150g Dark soft brown sugar
  • 250g Plain flour
  • 2tsp Baking powder
  • 2.5g Salt
  • 1tsp Mixed spice
  • 1tbsp Whisky marmalade
  • 1 Egg
  • 20g Melted butter

Method

  1. Soak the dried fruit in the tea overnight.
  2. In a mixing bowl, mix the dry ingredients (sugar, flour, baking powder, salt and mixed spice).
  3. Stir in the mixed fruit, tea, marmalade, egg and melted butter and mix thoroughly.
  4. Pour into a lined loaf tin and bake at 160C for ~1hr15, covering with foil if it gets too dark.
  5. Allow to cool slightly and remove to a wire rack to cool.

Here is the finished article! (The colour balance has gone a bit weird - it's not nearly such a strange colour in reality)


And the verdict? Well, it's nothing special - it is essentially just a tea loaf after all - but then I don't think that baking always needs to be special. It is, however, really rather nice, certainly when still warm and fresh from the oven - the real test will come tomorrow once it's cold. For now at least, I will say that it's pretty lovely - it's super moist from the tea-soaked fruit and the long, low temperature bake, and the spice is relatively subtle, but sufficient to prevent it from being boring. And best of all, it's such an incredibly easy thing to bake - something that you can really easily do on a weeknight!

[Update] I think I wasn't quite generous enough with my initial verdict - this has shot right up to pretty near the top of my list of favourite baking things! It's really not special at all, but I really think that's a big part of its charm - something that you can just enjoy without necessarily paying all that much attention to. It's stayed really moist, and the flavours are still really nicely balanced - I don't know if I'd say that they've noticeably developed though. Given how easy this one is to do, I think it's absolutely one of my best recipes now!

Saturday 21 August 2021

Cake or elaborate cocktail?

It's been a while since I baked anything, but I've still been bookmarking the interesting sounding recipes that I stumble across. This time around, it's a rum cake - but it caught my eye because the original recipe which I'm basing this cake on had 2/3rds of a bottle of rum in it! Unfortunately though, it's an American recipe, and includes instant vanilla pudding mix as an ingredient. Lots of forums seem to suggest that instant custard powder is an adequate substitute, but using this recipe as a rough guide, I've just tweaked the quantities and added a bit of cornflour instead. I've also scaled the quantities down and knocked down the amount of sugar, as I find that most American recipes are ridiculously oversweetened - and this one looked like it's got far too much sugar to me. This one's quite a step into the unknown, as I've messed around so much with the starting recipe that it's probably not fair to call it the same cake...

Boozy rum cake

Ingredients

For the cake

  • 175g Butter
  • 520g Granulated sugar*
  • 400g Plain flour
  • 30g Cornflour**
  • 2tsp (9g) Baking powder
  • 5g Salt
  • 150g Vegetable oil
  • 6 Eggs
  • 180g Milk
  • 180g Spiced rum
  • 20g*** Vanilla extract

For the syrup

  • 190g Granulated sugar
  • 60g Water
  • 110g Butter
  • 120g Spiced rum
  • 1tbsp Vanilla extract

*There's no particularly good reason why I went with granulated sugar this time around - I just didn't expect it would make any real difference to this cake, and it used so much sugar that I figured I'd go with the cheaper option!

**I had actually intended to add 40g of cornflour, but ran out. I can't see it making any real difference though.

***I couldn't be bothered to grab a tablespoon. I don't know how much 20g of vanilla extract is, but I was aiming for about 2tbsp...

Method

  1. Cream the butter and sugar together in a stand mixer until fluffy.
  2. Add the dry ingredients (flour, cornflour, baking powder, salt) and mix until homogenous and breadcrumb-like.
  3. Drizzle the oil in gradually.
  4. Beat the eggs and mix with the milk. Gradually add to the mixer.
  5. Gradually add the rum and vanilla.
  6. Pour into greased and floured cake pans.
  7. Bake at 180C for 20 minutes, then turn down to 160C for a further 25 minutes.
  8. Heat the sugar and water in pan, stirring to dissolve the sugar.
  9. Stir in the butter and remove from the heat.
  10. Stir in the rum and vanilla.
  11. Remove the cakes from the oven and turn out from the pans while still hot.
  12. Brush the syrup liberally over the cakes and allow to cool.

Ready for the oven! I only intended to use the super-cute bee silicone cake tin on the right - clearly, I didn't scale the quantities down nearly enough. I think 2/3rds of the quantities I actually used would have been just about perfect 

And here they are out of the oven. I had thought this might be the case before I put them in to bake, but I think it's pretty clear that I used too much baking powder


Almost got it out of the tin intact! Maybe I can claim that this was intentional because it wouldn't fit on the plate otherwise, and after all, you always need a small mini cake to test, right?


Holy heck that syrup is boozy. This is definitely a cake that you mustn't eat before you drive...

Even having got the quantities so badly wrong, there is faaar too much syrup for the quantity of cake. And the ridiculous thing is, I'm pretty sure that I downscaled the syrup:cake ratio already. I did end up using all of it, but that's more because of my stubbornness - I'm guessing the cakes are verging on completely saturated.

Edit: I've completely changed my mind, having now finished eating it. There's absolutely not excessive amounts of syrup - perhaps it could even have done with a bit more. I'd forgotten that rum cakes are supposed to be soaked in the syrup - it's not a glaze. This cake was great though - and it got significantly better after aging for a couple of days. Definitely a special occasion cake, given the amount of rum and butter in it, but this was a definite winner!

Sunday 13 June 2021

The versatility of cast iron

I like cookies generally, but I've got a particular affection for ludicrously large, whole-batch cookies. I think this is in a large part because of a time in the second year of my undergrad when my friend Valerie came over and we decided that we were going to bake cookies - but were too lazy to make individual cookies, so decided just to make one giant cookie the size of the baking tray instead and we decorated half each. I'm not 100% certain, but I'm reasonably confident that we used my regular cookie recipe, but without any chocolate or nuts - it was a spur-of-the-moment choice to bake, and this was in the days before I actually kept a decent stock of store-cupboard ingredients (I was a student, after all!).

In any case, I've been meaning to try this recipe for a while. I'm now sold on the general utility and greatness of my cast iron skillet, and this just looked like an excellent use for it. This particular recipe is the America's Test Kitchen one, but they've now put their recipe behind a paywall, so I'm actually referencing the Hummingbird High version, who handily also have weights for the ingredients - like them, I also have a 10" skillet rather than a 12" one.

Cast Iron Skillet Cookie

Ingredients

  • 170g Butter
  • 150g Dark brown sugar
  • 100g Caster sugar
  • 2tsp Vanilla extract
  • 6g Salt
  • 1 Whole egg
  • 1 Egg yolk
  • 250g Plain flour
  • 1/2 tsp Bicarbonate of soda
  • 170g Chopped plain chocolate

Method

  1. Brown 130g of the butter in the cast iron skillet, cooking it over a medium heat for ~5 mins until dark golden brown and nutty.
  2. Pour melted butter into a mixing bowl and stir in the rest of the butter.
  3. Whisk sugar, vanilla and salt into melted butter until smooth.
  4. Whisk egg and yolk in for 30 seconds. Leave to stand for 3 minutes.
  5. Repeat 30 seconds whisking and 3 minutes resting twice more.
  6. Mix flour and bicarbonate of soda together. Stir into butter mixture until just combined.
  7. Stir in chocolate chips.
  8. Press into an even layer in the base of the skillet.
  9. Bake at 190C for ~20-30 minutes.
  10. Leave to cool in the skillet.
Here it is, ready for the oven.

And straight out of it. I was a little concerned about how well it would rise, given that it uses bicarb without anything obviously acidic, but clearly my concerns were misplaced!


It's pretty pleasing how cleanly it turned out of the skillet.


It's really pretty good overall. I think it has a teensy touch too much salt personally, and also came out slightly greasy, so I think perhaps it could do with a little less butter too. I think it could also have stood to bake for a little longer - but overall it's really quite good. Fairly fudgy, a bit cakey - perhaps partway between a cookie and a brownie. Definitely good though, and not much hassle to bake!

Friday 4 June 2021

Actually baking!

Very excitingly, I'm getting to see my family this weekend for the first time since the very first lockdown last year. A lot has happened recently, but one of the many interesting things is that my brother has bought and moved into a new house - so although it's not the excuse for meeting up, it's still also sort of a housewarming. So I thought I'd do the whole bread-and-salt thing (I never knew about this until I bought a house and suddenly was inundated with more bread than I could eat in one go and more salt than I knew what to do with, but I still think it's a lovely tradition). Time for Aage to shine!

Housewarming Loaf

Ingredients

  • 150g Strong wholemeal flour
  • 100g Aage
  • 400ml Water
  • 450g Strong white flour
  • 13g Salt

Method

  1. Make a poolish: Mix the wholemeal flour, Aage and 150g of the water in a bowl and cover tightly with cling film. Leave in the refrigerator overnight.
  2. Autolyse: Mix the white flour with the remaining 250g water to form a dough. Wrap the bowl in a bin bag and leave on the counter overnight.
  3. 8:45am: Add the salt to the dough, and knead the poolish in until fully combined and homogenous. Wrap bowl in bin bag and leave to rise.
  4. 9:30am: Perform first set of stretch-and-folds.
  5. 10am: Perform second set of stretch-and-folds.
  6. 10:30am: Perform third set of stretch-and-folds.
  7. 1pm: Knead dough and shape, placing on a parchment square in a bowl. Leave to prove.
  8. 8pm: Preheat oven on max setting with cast iron combo cooker inside.
  9. 8:30pm: Transfer to preheated combo cooker. Turn oven down to 210C and bake for 20 minutes.*
  10. 8:50pm: Remove top of combo cooker and continue to bake for a further 20 minutes.
*I was intending to score the top of the loaf before putting it in the oven - but naturally, I completely forgot. Oh well...

Here is the dough post-prove, about to go into the oven. As you can see, it's pretty much a liquid, so I decided to pop it into the deep side of the combo cooker rather than the shallow side, as I wasn't sure it would stay within the confines of the lid.

Isn't this a gorgeous loaf? I think this might be one of the best looking loaves I've ever baked actually - it's a real shame that I forgot to score the top. Such a pleasing colour to it. I don't think that I got the bake quite right - the crust seems incredibly thin, and I'm not actually certain that it's cooked all the way through, so I'm fairly certain I should have given it a bit longer in the oven. But never mind all that for now - look how pretty it is!


It definitely could have done with a little longer in the oven, but actually, it turned out pretty well! Not a bad crumb, though I suspect it was a little over-proved, but certainly not disastrously so.

Sunday 25 April 2021

Still not baking

While I'm posting stuff that's not-quite-baking, it's occurred to me that I never followed up on the initial bread machine post from last year. It didn't take too long to hone the bread machine recipe into one that is actually not bad - though it bears very, very little resemblance to the one in the manual that we started from. But in case it's useful to anyone out there, here is what we have settled on as our "standard" bread machine loaf:

A Better Bread Machine Loaf

Ingredients

  • 270ml Water
  • 7g/1tsp Salt
  • ~1tbsp Olive oil
  • ~1/2 tbsp Sugar
  • 180g Strong wholemeal flour
  • 180g Strong white flour
  • 7g/1 sachet Yeast

Settings

  • 1lb/1.5lb Loaf size (our machine only does two sizes - this is the smaller one)
  • Dark crust
  • French bread programme
The regular programme works fine, but the French bread one has a slightly longer rise time, which seems to give a marginally better result. Likewise, the 50/50 brown/white flour split gives a nice texture (in our opinion), but it does work pretty well using just one or the other.

Almost baking

By long standing convention, pizza and pancakes are not "baking" for the purposes of the blog (mostly because I make them so much more frequently than anything else and I'm too lazy to write them up every single time). But we'll make an exception this time around because, rather incredibly, I don't think I've ever made drop scones/scotch pancakes before - at least not that I can recall. Well, today I fixed that!

Drop Scones

Ingredients

  • 200g Plain flour
  • 2 tsp/10g Baking powder
  • 1/2 tsp/3.5g* Salt
  • 50g Caster sugar
  • 1 Egg
  • 270ml Milk

Method

  1. Mix flour, baking powder, salt and sugar in a mixing bowl.
  2. Beat egg and milk together.
  3. Pour liquid into dry ingredients gradually, mixing to a batter around the consistency of double cream.
  4. Fry a couple of tablespoons of batter at a time, flipping after ~2-3 mins once a crust has formed and the surface goes bubbly.

Here's about half the stack. The other half might have got eaten before I thought to take a picture...


These were amazing though! Soft, light, fluffy - and very, very easy!

*In case anyone's wondering, after struggling for years with measuring out salt accurately and screwing bread up far too many times because of it, I finally went and bought a teeny tiny set of digital scales that weighs down to 0.01g precision. While I use it almost exclusively for salt, I suspect most other people who own such scales are very keen to measure quantities of herbs extremely accurately. Still, I'd definitely recommend it for anyone who also struggles with getting quantities of salt perfect when baking!

Sunday 7 February 2021

Abracadabra!

I felt like baking something today, but wasn't sure what to do. But leafing through the Magnolia Bakery Cookbook, the Magic Cookie Bars recipe caught my eye. It's a bit of a stab in the dark, as there's the usual American-to-British unit conversion required, and also some ingredient substitutions to account for what you can get in the UK (and more importantly, what I had in stock). But we'll see how it goes!

Magic Cookie Bars
Ingredients
  • 190g Plain chocolate digestives* (11 1/2 biscuits)
  • 115g Butter
  • 85g Chopped walnuts
  • 80g Plain chocolate chips
  • 110g Dessicated coconut**
  • 1 can (397g) Sweetened condensed milk
Method
  1. Crush the digestives.
  2. Melt the butter and mix with the crushed digestives.
  3. Press firmly into a 23cm square brownie pan.
  4. Evenly sprinkle the walnuts, chocolate chips, then coconut over the biscuit base.
  5. Pour the condensed milk over the top, spreading gently to cover completely.
  6. Bake at 160C for ~30mins until light golden brown.
  7. Remove and refrigerate until set before slicing and removing from tin.
*I would have gone with plain digestives if I had any in stock. I had to bump up the quantity of digestives by eye, as there's less biscuit per unit mass with chocolate digestives than plain ones.
**This is where I think I will have gone most wrong. The original recipe called for sweetened shredded coconut, and I didn't realise that dessicated coconut was different (it's dried out far more than shredded coconut). I'm pretty sure that I've used waaay too much coconut as a result. But dessicated coconut is unsweetened at least, so hopefully it'll still be okay.

Straight out of the oven:


Well, these turned out to be a surprise hit! I (inevitably) didn't have quite enough patience initially, and tried to retrieve a couple of pieces before it was properly set, which meant that the biscuit base just crumbled into dust. But despite that, these are really rather nice especially if you consider (a) how easy they are and (b) that it's made out of standard (at least for me) ingredients. The topping is a delight. The condensed milk turns into that gorgeous, gooey caramel than threatens to glue your jaws together, there's a bit of crunch from the walnut but not too much and then there's a little bit of chewiness from the coconut  - there might be a touch more coconut than perhaps there ought to be, but it's certainly not a problem. And all of that is balanced by the (relatively plain) biscuit base, which helps tone down the sweetness to more manageable levels and prevents the topping from actually gluing your jaw shut.

But while it's rather enjoyable and something that anyone with a sweet tooth (who doesn't object to coconut or walnuts) will appreciate, neither is it all that special. It's certainly not one of those sublime, delightful baked goods that gives you a moment of silent rapture - in many ways, it's rather ordinary. But that's not necessarily a bad thing. Given how easy this was (and it was, indeed, extremely easy - with little washing up too!), I think it's a great one to keep in the repertoire. It'd be perfect for coffee mornings with friends, or maybe even as cycling/hiking food on the go (that is, assuming we'll ever be able to do those things again!).

Saturday 23 January 2021

Time has no meaning

Or at least it's felt that way for the last year or so. But for once, I'm using that to my advantage. I'm declaring that it's still Christmas, so I'm baking stollen! I've tried doing stollen once before, many years ago, and while it wasn't bad, I remembered thinking that it was a bit dry. So I'm going to try a new recipe this time around. It's fundamentally cribbed from this one from the Guardian (which actually seems to have been published again), but also with some elements nabbed from this recipe too.

Marzipan Stollen Take Two

Ingredients

  • 160ml Milk
  • 1 sachet Yeast
  • 80g Mixed peel
  • 150g Raisins
  • 50ml Kirsch
  • 425g Plain flour
  • 50g Caster sugar
  • 7g (1tsp) Salt
  • 1 Egg
  • 1tbsp Vanilla extract
  • 150g Butter
  • 40g Blanched almonds
  • 320g Marzipan
  • Icing sugar

Method

  1. Warm the milk to ~40C and whisk in the yeast, a tablespoon of flour and a teaspoon of sugar. Cover and leave for a couple of hours.
  2. Mix the mixed peel, raisins and kirsch together. Leave to absorb.
  3. Mix the flour, sugar and salt together in a mixing bowl.
  4. Mix in the egg, vanilla and yeast mixture.
  5. Melt the butter and incorporate into the flour mixture to form a dough.
  6. Knead for ~10 mins.
  7. Return to mixing bowl, wrap in a bin liner and leave to rise for ~2 hours.
  8. Chop the almonds.
  9. Knead the dough, add the fruit and almonds and knead to distribute.
  10. Shape dough and fold over the slab of marzipan.
  11. Place on baking tray, return to bin liner and leave to prove for ~3 hours.
  12. Bake at 180C for ~50 mins until internal temperature is 90C.
  13. Brush with melted butter and dust heavily with icing sugar.
  14. Repeat step 13.
  15. Leave to cool fully.
No, the amount of marzipan isn't a typo - I'm always disappointed by how little marzipan there is in when I get a slice of stollen. I also significantly bumped up the amount of fruit and nuts, because, well, why not?

Here it is at the end of step 11, just before the final proof.

And ready for the oven. I'd have liked a little bit more of a rise, but it already had 3 hours of proving, and I didn't want it to get too late before it came out of the oven.

Fresh from the oven. It got a little bit darker than I would have liked - I did end up turning the oven down to 160C for the last part.

Without any exaggeration, I think that this might possibly be the most unhealthy thing I've ever made. The topping means that there's pretty much an entire block of butter in this one stollen, and there's really quite a lot of icing sugar added as well (the recipe did say to dust heavily...). And on top of that, remember that there's three quarters of a packet of marzipan in there for good measure. It does look good though!


This one was far better than the first time I tried making stollen - the huge amount of butter made a real difference to how moist it was, and the ridiculous butter-sugar-butter-sugar coating really makes it special in my opinion (I've seen some recipes say that you should go for three or even four coats!). But I'm also glad that I managed to pass on just over half of the stollen to friends - I think Fiona and I might have ended up with heart attacks if we'd eaten it all ourselves! This definitely needs to be a (very) occasional treat, but it's well worth the effort I think!