Tuesday 2 January 2024

What to do with egg whites

 In the past, I've normally made a pavlova alongside the tiramisu, to use up the egg whites. But I don't actually like meringue all that much. So this time around, I thought I'd try something a bit different. I found a recipe for an easy chocolate mousse that looked, well, really easy.

Easy Chocolate Mousse

Ingredients

  • 150g Dark chocolate
  • 6 Egg whites
  • 2tbsp Caster sugar

Method

  1. Melt the chocolate in the microwave.
  2. Whisk the egg whites with the sugar until it forms stiff peaks.
  3. Fold the egg whites into the chocolate.
  4. Pour into ramekins and refrigerate to set.

Simple, no? Still not quite simple enough for me not to make a bit of a hash of it - I lost a heck of a lot of air in the folding, and I think my chocolate was too cool to begin with and started to set immediately, so I've got flecks throughout. It doesn't look stellar, but it was ridiculously simple.


Friday 29 December 2023

It's been a very long time...

For some reason, the idea to make a tiramisu occurred to me over Christmas, so I got stuff in for it. I've only got one recipe for tiramisu, which I'm fairly sure is a Prue Leith recipe from the Good Book, so it's the same recipe as the last time - which apparently was all the way back in 2009! As ever, I left out the wine, and was somewhat short on sponge fingers because apparently the Sainsbury's pack of sponge fingers that "serves 30" only came with 26 in it. Apparently having an entire sponge finger would be excessive...

Here it is just before going into the fridge. It turns out that not only do I still have the tupperware container that I used the last time, but I remembered that it was the perfect size for this tiramisu!


Saturday 18 November 2023

Simple cherry muffins

I don't get to bake as often as I used to, but sometimes you just wake up and feel like baking. Today was one of those days. I thought I'd try to use up the frozen cherries that we have had sitting in the freezer for far too long, so cherry muffins sounded like a good idea. I'm cribbing this recipe, which just happened to be one of the first few search results.

Simple Cherry Muffins

Ingredients

  • 1 Egg
  • 120g Vegetable oil
  • 155g Milk
  • 1-2tbsp* Vanilla extract
  • 300g Plain flour
  • 3tsp Baking powder
  • 100g Caster sugar
  • 205g Frozen cherries

Method

  1. Mix the egg, oil, milk and vanilla together.
  2. In a mixing bowl, mix the flour, baking powder and sugar together.
  3. Stir the wet ingredients into the dry ingredients.
  4. Fold in the frozen cherries
  5. Spoon into cupcake cases and bake at 180C for ~25 mins.

*I didn't bother measuring this, so I don't know how much vanilla I actually used. I was pretty heavy handed with it though!

One small snag was that I didn't have a suitable cupcake/muffin tin. I had an idea though (which might end up being an awful one), which was that if I crammed the cases together on a normal baking tray, they'd push up against each other as they expanded and they'd support each other. So goes the theory anyway - we might just end up with it taking ages to bake in the centre because of the proximity. In any case, this is what they looked like going in to the oven.

You know, it kinda worked! They're all weird shapes as a result, but I kinda like that. The ones in the centre were looking rather a lot paler than the ones at the edges though, so after taking this photo, I took the edge ones off the tray and put the inner ones back in for another few minutes.

It's an awful photo, but here's the finished result. I couldn't quite get them onto a single layer on the plate...

And of course, the verdict - pretty good overall. They're not the most exciting muffins ever, but they're nice. They're also not overly sweet, which is usually my concern when trying a random recipe that I've just found online; in actual fact, I'd say that these are nicely balanced. Nothing to write home about perhaps, but they go very well with a cup of tea!

Thursday 31 August 2023

Birthday cinnamon rolls

It's Rich's 75th this week, and there's a big party planned for the weekend. I said that I'd bake something for it, and a request was made for cinnamon rolls, so that's what I'm doing! I'm doing a double-batch this time around. It's essentially the normal recipe as far as ingredients goes - I used ~120ml spiced rum and ~180ml white rum to soak the raisins, and substituted a small amount of the caster sugar in the filling with dark soft brown sugar (mostly to use up the bag of it). I also ran out of raisins (which, let's face it, are basically the same as sultanas anyway), but discovered that cheap mixed fruit is just a mixture of raisins and mixed peel, so I spent a ridiculous 10 minutes picking raisins out of a bag of mixed fruit to make up the difference.

The real change to the recipe this time around is that, in order to make the timings work, I'm going for an overnight proof. After forming and cutting the rolls, I've popped each of the trays of cinnamon rolls in a bin bag to prevent them drying out, and put them in the fridge. I'll get them out of the fridge in the morning, and give them a few (hopefully around 3) hours to warm up to room temperature, then egg wash, bake and finish as normal. Fingers crossed that this works!

------

And a quick addition from the next day - looks like it wasn't harmed by the overnight proof. They got just shy of 3 hours at room temperature before going into the oven, and while I would have liked to have got a little bit more of a rise before they went in, they're not looking bad. Here they are post egg-wash about to go in:

Straight from the oven, they're looking as good as usual!

Monday 8 May 2023

¡ǝlddɐǝuᴉԀ

 It's a bank holiday, and I'm not teaching for once! The weather's a bit crap too, so it's a perfect opportunity to bake something. For no reason other than the fact that I saw it online and it looked good and easy, I'decided to go for this pineapple upside-down cake from King Arthur Baking, with only very minor substitutions for what ingredients I had.

Pineapple Upside-Down Cake

Ingredients

For the topping

  • 57g Butter
  • 106g Soft dark brown sugar
  • 1/4 tsp Ground cinnamon
  • 1/4 tsp Ground ginger
  • 1 large tin (425g) Pineapple slices
  • 7 Frozen cherries 

For the cake

  • 43g Butter
  • 149g Granulated sugar
  • 1 Egg
  • 1/2 tsp Salt
  • 1 3/4 Baking powder
  • 1 tsp Vanilla extract
  • 150g Plain flour
  • 113g Milk

Method

  1. Melt the butter for the topping.
  2. Mix in the dark brown sugar, cinnamon and ginger.
  3. Spread over the base of a greased cast iron skillet*.
  4. Arrange the pineapple slices and cherries over the top.
  5. Cream the butter for the cake and granulated sugar together.
  6. Beat in the egg, salt, baking powder and vanilla.
  7. Mix in the plain flour and milk, alternating a little at a time, to form a relatively thick batter.
  8. Spoon over the toppings.
  9. Bake at 190C for ~30 mins until a skewer comes out clean.
  10. Remove from oven and wait 3 minutes.
  11. Invert onto a plate and wait 30s before lifting the pan off.
*I think I've got a 10 inch skillet

Here's the topping at the end of step 4:

And here's the cake ready for the oven. The layers are both fairly thin, but I did get full coverage on both.

It released cleanly from the pan! Looks pretty darned good in my opinion.

This one surprised me with how good it was overall. The cake part is rather bland and boring, but it's thin enough that it doesn't really matter. But the topping is lovely - rather sweet, but again thin enough not to be overwhelming. For the low effort required, this cake is really rather good!

Monday 19 September 2022

Makgeolli update - Day 17

Wow, what a difference a week makes! It's now about 8 days post-bottling, and the makgeolli has been sitting in the fridge in that time. I'm now pretty certain that I bottled it early, as the makgeolli is fully carbonated - I decided to release the pressure this morning to prevent the bottles from exploding in the fridge, and the full bottle was a heck of a lot more carbonated than fizzy drinks bought from the shop!

Whereas the makgeolli tasted ridiculously, unpleasantly sour when it was first bottled, it has mellowed quite a lot in the last week. It's still distinctly sour, and has developed a bit of a bitterness too, but there's now flavour beyond the sourness. It definitely tastes like makgeolli now, and I'd even go as far as to say that it's pleasant - not exactly a drink that I'd order, but one that I'd be happy to drink if it was there. I think we can declare this a success now! I think it might be improved with a bit of sweetness, so I might give adding a little sugar to it a go next time I drink it - but I'm pretty happy with it as a first attempt. I'll have to do a bit of reading to see if I can figure out how to make it naturally sweeter for next time - and yes, I think there will be a next time! 

Sunday 11 September 2022

My First Makgeolli Experiment - Day 9

Okay, so I forgot to do an update last night, but that's okay, because I decided that it was time to filter and bottle. It had about 7 1/2 days to ferment before bottling - I have no idea if I'm bottling late or early really; it's been pretty warm over the fermentation period (sitting in the 20-25C range for the most part).

For comparison, here's what the jar looked like just before I filtered it out. You could still hear some bubbling when disturbed, so I might have bottled it relatively early.


Filtering the brew was a right faff. I strained it through four layers of cheesecloth into a mixing bowl, and kept squirting it through gaps in the top where I drew the edges together, so I ended up having to strain it all twice. I think I might need to go and buy a proper filtering bag...

After all that, it made about 1 1/4 litres of makgeolli concentrate.

Right now, it tastes very sour, and it's room temperature so it's really hard to assess the taste properly - but it's definitely pretty alcoholic! I'll chill it down in the fridge and give it a proper taste tonight when it's cold. I'm hoping that the taste will mature over the next couple of days too, and maybe pick up a bit of carbonation - but we will see!

[Edit] Quick update at the end of the day, after the makgeolli extract had had time to chill: It's a heck of a lot better when cold! It's still very, very sour - so much so that I suspect that I might need to add a bit of sugar to make it palatable - but it definitely has some of the taste/texture that I expect from makgeolli. I still haven't given it a proper go yet (I just had the tiniest little taste), and I'm hoping that it might mellow a bit and gain a bit of carbonation over the next few days. I wouldn't say that the tiny taste I had of it was nice, but it's not too bad either, and I think it's recognisable as makgeolli, so that's a definite success at least. I'm cautiously optimistic at least. We'll see how it turns out in a few days' time!

Friday 9 September 2022

My First Makgeolli Experiment - Day 7

I think we're nearly there! There's very little change compared with yesterday, and it's smelling rather alcoholic. It's been fermenting for 6 days now, so we'll see how it is tomorrow, but we might be nearly ready to filter and bottle it very soon!


Thursday 8 September 2022

My First Makgeolli Experiment - Day 6

The changes are now pretty subtle - the layer of floating rice on the top is definitely thinning out, and there is less in the way of trapped bubbles now. It looks like the fermentation is slowing down. There's also now a distinct smell of alcohol - not strong, but it definitely smells alcoholic. It looks like we're getting there!


Wednesday 7 September 2022

My First Makgeolli Experiment - Day 5

After 4 days and a couple of hours of fermenting (I really should have started on day 0; that would have been much less confusing), there are no huge changes from yesterday. I think the upper layer of rice is thinning out a little, and perhaps there aren't so many bubbles in it, but it does look pretty similar to yesterday. I cracked the lid open to have a smell - it definitely seems to be developing a little bit of sweetness to the aroma now, but I wouldn't say that that was the main scent. It still mostly smells of fermentation, but not quite the same scent as with bread or beer.


Tuesday 6 September 2022

My First Makgeolli Experiment - Day 4

I gave it one last (extra) stir this morning, at about the 64 hour mark, which will be the last until it gets decanted and filtered! The three layers are beginning to become a little more prominent again this evening - the murky liquid layer is definitely thicker than before. Lots of bubbles still visible, particularly in the floating rice layer on top. I didn't open the jar to smell it this evening - I thought I ought to leave it undisturbed for a little. 


Monday 5 September 2022

My First Makgeolli Experiment - Day 3

Around 51 hours in, there's just a little hint of three layers forming now. It was actually clearer a couple of hours ago, but the bottom layer of sediment has grown a bit since then. The earthiness has pretty much vanished from the smell; I wouldn't say that it smells like the normal yeasty smell, but it's more like that than it was before. There's maybe a slight hint of sweetness to the smell, but I'm not certain that I'm not just imagining it.


Sunday 4 September 2022

My First Makgeolli Experiment - Day 2

After about 27 hours, there are noticeable changes! There's now a thin layer of liquid evident at the bottom with some bubbling, which I guess is a good sign. The rice has really started to break down now - the texture is much more like watery, cooked porridge (whereas yesterday it felt pretty dry and firm). It smells similar to how it did yesterday - a relatively faint smell of the nuruk, which smells a bit earthy like dried mushrooms - no obvious smell of alcohol or yeast yet.


Saturday 3 September 2022

My First Makgeolli Experiment - Day 1

This isn't even remotely baking, but it does involve yeast, so maybe it's relevant enough anyway. I really like makgeolli, but it's really expensive to buy in the UK. But it also looks really easy to brew a basic makgeolli, as long as you can get hold of nuruk - which was where the snag was for quite a long time. But eventually, I discovered that there is a single brand of nuruk that is imported into the UK by HMart (and this is the only brand and only supplier I've managed to find after quite extensive searching). Unhelpfully, it's not labelled as "nuruk" but rather Choripdong Enzyme Powder, which explains why I had such a hard time finding it. But now that I've found it, I've bought some together with a couple of kilos of sweet rice (chapssal), and it's time to try making my first makgeolli! I'm following the basic recipe in the Primer on Brewing Makgeolli produced by the Korean government, but I've been surprised to discover that pretty much all of the basic starter danyangju recipes that I've seen agree incredibly closely on the ratio of about 1:1:0.1 for rice:water:nuruk.

First Makgeolli

Ingredients

  • 750g Sweet rice (chapssal)
  • 750ml Water
  • 70g Nuruk

Method

  1. Wash the rice until the water runs clear.
  2. Soak the rice for 2-6 hours.
  3. Drain the rice well.
  4. Steam the rice in a steamer lined with damp cheesecloth for 40 minutes.
  5. Remove the rice from the steamer and spread out to cool until it reaches ~25C.
  6. Put the cooled mixed rice in the fermentation jar with the water and nuruk, and mix thoroughly until the rice absorbs all of the water.
  7. Wipe down the insides of the jar, and cover loosely with the lid. I used a paper towel underneath the jar lid with the rubber gasket removed.
  8. Leave in a warm place (ideally ~20-25C) to ferment.
  9. Stir thoroughly every 12 hours for the first 48 hours, wiping down the sides of the jar after each stir.
  10. Leave to ferment for a total of ~7-10 days.
  11. Once fermentation is complete, stir the mixture together and filter through cheesecloth.
  12. Bottle the liquid and store refrigerated. Mix and dilute with water to drink.
Lots of the blogs I read and videos I watched really emphasised washing the rice until the water ran completely clear. I washed the rice continuously for around 15 minutes and the water still wasn't completely clear, so I gave up and decided that was good enough. I can't see it making any tangible difference given how washed the rice was - but at least all of our houseplants got well watered!

This is the rice just before steaming - it turns out that 750g is quite a lot of rice!

This is how it looks at the end of step 7. It's taken a surprisingly long time in total - I started washing rice a little before 11am this morning, and it was 6pm by the time it reached this stage. Admittedly, the first 5 hours was essentially just letting the rice soak, but it still feels like it's been a long process!

Friday 27 May 2022

Are bananas the fastest fruit?

I dunno, but we got overtaken by the bananas this week. In warm weather, bananas seem to ripen a bit like pears, and I ended up with a whole load of very mushy bananas that weren't great for eating - so time to do a traditional banana bread! The recipe is just the same one that I used before (that was eight years ago - eek!), where the only changes were that the bananas I used were very, very ripe and a little larger, giving ~450g of peeled bananas - I didn't scale any of the other ingredients though.

Here it is, ready for the oven:


Looks good straight out of the oven!

I'm a little concerned by how soft and wibbly it is, but I'm hoping that it'll firm up once it cools. I stabbed it multiple times with a skewer, which came out clean, so I think it's done - I guess there was an awful lot of banana in it, which might be contributing to the wibbling.

And the verdict? Yes, it was definitely quite under done - the texture is a bit mushy and rather soft (not altogether unlike extremely ripe bananas, unsurprisingly). But the flavour is absolutely wonderful - I'm amazed at how banana-y it is, and it's got just the right sweetness to it. It's got a really, really lovely flavour to it - and actually, the texture is rather nice once you've got used to it - it's just that this one is more banana than bread (which might not actually be a bad thing overall!).

Sunday 13 February 2022

A well-baked tart?

I saw this post on Reddit last week, and decided that baking a bakewell tart sounded like an excellent idea. And so now I'm doing just that. Sometimes there's no more backstory to my bakes than that!

Bakewell Tart

Ingredients

For the pastry

  • 140g Plain flour
  • 7g (~1tbsp) Caster sugar
  • 2g Salt
  • 70g Butter
  • ~2tbsp Cold water

For the filling

  • 125g Caster sugar
  • 125g Butter
  • 1 Egg
  • 30g Plain flour
  • 125g Ground almonds
  • 90g (~3tbsp) Black cherry jam*
  • 25g Flaked almonds

Method

  1. Rub the flour, sugar, salt and butter for the pastry together until it resembles breadcrumbs.
  2. Add just enough water to form a dough.
  3. Roll out and line a greased pie dish**.
  4. Refrigerate for 30 minutes.
  5. Prick the base with a fork, fill with baking beans.
  6. Bake blind at 180C for ~15 minutes, remove the baking beans and bake for a further ~5 mins.
  7. Cream the butter and sugar for the filling together.
  8. Beat in the egg.
  9. Mix in the flour and ground almonds.
  10. Spread the jam generously over the base of the pie dish, then fill with almond mixture.
  11. Sprinkle the flaked almonds over the top.
  12. Bake at 160C for ~40mins, then increase temperature to 200C for ~5 minutes to brown.
  13. Leave to cool for 5 minutes before removing from the pie dish and leaving to cool fully.
*Yes, I know raspberry is probably most traditional, but (a) it's what I had in the fridge and (b) cherry jam is tastier than raspberry jam anyway.
**For reference, my pie dish is around 16cm diameter (quite small) - but could easily be anywhere between 15cm and 18cm depending on how you choose to measure it.

I can hardly believe it - for once, I actually got the quantities of both pastry and filling right! Here's the tart about to go into the oven.

Gosh it looks good fresh from the oven! It wobbles rather a lot more than I had expected though - I'm hoping that it sets properly when it cools. I'm a little concerned that there might not be enough egg and/or flour in the frangipane.

I don't think I needed to worry. By the time I turned it out from the dish, it had firmed up nicely. It released incredibly easily too!

And obviously, I didn't have the patience to wait for it to cool, so I dived straight in while it was still hot. Which is a terrible mistake actually - you can see that the jam started leaking out and warm frangipane isn't actually as nice as it is once it's cold. But just look at it!


First impressions are pretty good on the whole. The pastry could have been a bit shorter, but it's not tough either. I definitely oversalted it slightly though - not horrendously so, but you can taste the salt which isn't ideal. For the filling, it's hard to tell while the frangipane is still warm, but I think there might be a little too much butter in the filling, and I'm also not quite sure I got the jam:frangipane ratio right. We will have to wait and see once it's actually cooled!

Edit: The verdict once it cooled was pretty similar to what I thought beforehand. The oversalted pastry was less noticeable, but the frangipane definitely seemed too buttery - perhaps a little less butter and maybe a little more flour would have helped. Fiona and I both agreed that it could have done with a bit more jam too. I think perhaps a slightly thicker pastry would have been nice as well, and would have helped offset the softness of the frangipane. But overall, it's pretty good!

Tuesday 4 January 2022

Other spices are available

Today's Fiona's official birthday. She doesn't usually have an official birthday, but her real birthday is inconveniently close to the start of her new job, so she's decided that this year she's having an official birthday. In celebration, I'm making cinnamon rolls, but in the spirit of experimentation, I decided to try out some other spices too. Half of the batch (6 rolls) is just straight up, classic cinnamon, but we're trying out nutmeg, cardamom, mixed spice and chilli powder (separately). But of course I'm lazy, so rather than making four different butter-sugar-spice pastes, I did it as normal for cinnamon, but just made plain spiceless butter-sugar paste for all of the experimental rolls and then sprinkled the spice over the top.

Left: cinnamon. Right, top-to-bottom: nutmeg, cardamom, mixed spice and chilli powder.


...And I've already forgotten which was which. The right hand 6 are definitely cinnamon, and the one in the very top-left corner is chilli, but I absolutely can't remember the rest. I'm sure we'll figure it out when we eat them!

I had a bit of a nightmare getting these to prove, as it was so cold in the house for most of the day. In the end, they had about 6 hours to rise, and still only really got going in the final hour when I threw in the towel and put them in the oven set to about the lowest setting I could (well below the lowest marked temperature). Certainly not an ideal rise - you can see some of the butter paste has melted out from me having to whack it into the oven...

And this is as close to a finished picture as you get this time around - the glaze is still in the saucepan that you can see behind, but I got a bit too excited once the buns were glazed and forgot to take a final finished photo. But really, can you blame me? Cinnamon rolls fresh from the oven are really hard to resist! They came out alright in the end - I had thought I'd let them brown too much initially and ended up turning the oven all the way down to 160C instead of 180C, but I got away with it.

The cinnamon rolls were lovely as always- but what about the experimental ones? Well, the chilli powder was very meh in the end - you could feel the heat and it gave a pleasant warmth, but really it wasn't worth the effort. It was still nice, but honestly I'd say it was a waste of what could have become a cinnamon roll. The cardamom was actually really quite good - for once I managed to make a cardamom flavoured pastry without overdoing it - but definitely still not as nice as cinnamon. Good as a change though! Sadly though, both the nutmeg and mixed spice ones were vastly underspiced, and were incredibly subtle. From what you could taste, I think both seemed promising, but it was rather hard to tell!

Tuesday 30 November 2021

A very special birthday

Yesterday was a milestone day for a key contributor to my baking. It was 10 years ago(!) that we first said hello to Aage, and he's been a faithful companion ever since. I had hoped to be able to bake a loaf of bread to celebrate his 10th birthday yesterday, but we had been travelling back from a Thanksgiving weekend away with Fiona's family, and I was absolutely exhausted and Aage hadn't been fed. But that very first sourdough loaf ten years ago was made with an overnight rise - so today is still the 10th anniversary of the very first loaf that I baked with Aage. However you cut it though, we're celebrating a decade with Aage!

A Birthday Loaf

Ingredients

For the sponge

  • 175g Aage
  • 150g Warm water
  • 100g Wholemeal flour
For the dough
  • 100g Warm water
  • 300g Wholemeal flour
  • 8g Salt

Method

  1. Mix together the ingredients for the sponge in a mixing bowl and wrap in a bin bag.
  2. Leave in a warm place for ~5 hours.
  3. Add the sponge to all the remaining ingredients and mix to form a dough.
  4. Knead for ~15 minutes, then shape and wrap in the bin bag once again.
  5. Leave to prove for ~1.25 hours.
  6. Preheat oven to 220C with a Dutch oven inside.
  7. Score and place dough in Dutch oven, sprinkling lightly with water.
  8. Bake for 15 minutes.
  9. Remove lid of Dutch oven, turn oven down to 200C and bake for a further 15 minutes.

This one's a bit of a quick, relatively basic loaf. It's actually quite a low hydration bread because I wanted to make it easy for myself given that I was baking on a weeknight. But it's really nice to be baking by hand again - it's been quite a long time!

I baked this one on the baking parchment. I still haven't got the hang of scoring my bread...


The cuts opened up nicely, even if they did look rather raggedy before going it went into the oven

I was rushing this one so that we could have the bread for dinner, so this loaf was a bit underdone - I knew it would be, but I was getting hungry and impatient. But it's still not bad - just a little stodgy in the centre. I think it could have done with another quarter hour or maybe even half an hour longer in the oven. But the crust has a lovely texture to it, and there's a great flavour to the bread anyway, so it's not all bad!

Monday 22 November 2021

Baking on a school night?!

Well, I didn't manage to fit cake baking into the weekend, but amazingly I've managed to find time on a Monday night to bake! We're off for a Thanksgiving weekend away with Fiona's family at the weekend, so I thought I'd bake something to bring with us. I decided that the rum cake I made recently would probably go down well - I think the audience will appreciate the booziness - and most importantly it's incredibly easy to make with the stand mixer. I'm only making extremely small changes this time around - I used salted butter in the cake so omitted the salt completely, increased the amount of cornflour to 40g (as it was originally supposed to be), reduced the amount of baking powder to 7.5g and the amount of rum in the cake portion to 150g. There are also going to be a couple of kids coming, so I made the same quantity of rum syrup as before just for the main honeycomb shaped cake (so massively increasing the amount of syrup from last time), and about two thirds of that quantity of syrup without any rum for the round cake alone.

I'm not quite sure what happened this time around, but the cakes seem quite a lot more fragile straight out of the oven than last time. The honeycomb cake broke up quite badly getting it out of the tin.


The finished article - it looks just as obscenely decadent as it did last time around...

Tuesday 5 October 2021

Bara brith

I hadn't even heard of bara brith until stumbling across it online last week, but it sounded fun, tasty and easy! From my brief dive down the rabbit hole, it seems that it's something that's evolved over time, starting off as a yeasted bread with dried fruit into something more cakey. I'm very much doing the latter here, but at some point I might also get around to baking one of the more traditional recipes I found. I'm winging it a bit, but it's essentially a mashup of these three recipes.

Bara Brith

Ingredients

  • 280g Dried mixed fruit
  • 300ml Strong tea
  • 150g Dark soft brown sugar
  • 250g Plain flour
  • 2tsp Baking powder
  • 2.5g Salt
  • 1tsp Mixed spice
  • 1tbsp Whisky marmalade
  • 1 Egg
  • 20g Melted butter

Method

  1. Soak the dried fruit in the tea overnight.
  2. In a mixing bowl, mix the dry ingredients (sugar, flour, baking powder, salt and mixed spice).
  3. Stir in the mixed fruit, tea, marmalade, egg and melted butter and mix thoroughly.
  4. Pour into a lined loaf tin and bake at 160C for ~1hr15, covering with foil if it gets too dark.
  5. Allow to cool slightly and remove to a wire rack to cool.

Here is the finished article! (The colour balance has gone a bit weird - it's not nearly such a strange colour in reality)


And the verdict? Well, it's nothing special - it is essentially just a tea loaf after all - but then I don't think that baking always needs to be special. It is, however, really rather nice, certainly when still warm and fresh from the oven - the real test will come tomorrow once it's cold. For now at least, I will say that it's pretty lovely - it's super moist from the tea-soaked fruit and the long, low temperature bake, and the spice is relatively subtle, but sufficient to prevent it from being boring. And best of all, it's such an incredibly easy thing to bake - something that you can really easily do on a weeknight!

[Update] I think I wasn't quite generous enough with my initial verdict - this has shot right up to pretty near the top of my list of favourite baking things! It's really not special at all, but I really think that's a big part of its charm - something that you can just enjoy without necessarily paying all that much attention to. It's stayed really moist, and the flavours are still really nicely balanced - I don't know if I'd say that they've noticeably developed though. Given how easy this one is to do, I think it's absolutely one of my best recipes now!

Saturday 21 August 2021

Cake or elaborate cocktail?

It's been a while since I baked anything, but I've still been bookmarking the interesting sounding recipes that I stumble across. This time around, it's a rum cake - but it caught my eye because the original recipe which I'm basing this cake on had 2/3rds of a bottle of rum in it! Unfortunately though, it's an American recipe, and includes instant vanilla pudding mix as an ingredient. Lots of forums seem to suggest that instant custard powder is an adequate substitute, but using this recipe as a rough guide, I've just tweaked the quantities and added a bit of cornflour instead. I've also scaled the quantities down and knocked down the amount of sugar, as I find that most American recipes are ridiculously oversweetened - and this one looked like it's got far too much sugar to me. This one's quite a step into the unknown, as I've messed around so much with the starting recipe that it's probably not fair to call it the same cake...

Boozy rum cake

Ingredients

For the cake

  • 175g Butter
  • 520g Granulated sugar*
  • 400g Plain flour
  • 30g Cornflour**
  • 2tsp (9g) Baking powder
  • 5g Salt
  • 150g Vegetable oil
  • 6 Eggs
  • 180g Milk
  • 180g Spiced rum
  • 20g*** Vanilla extract

For the syrup

  • 190g Granulated sugar
  • 60g Water
  • 110g Butter
  • 120g Spiced rum
  • 1tbsp Vanilla extract

*There's no particularly good reason why I went with granulated sugar this time around - I just didn't expect it would make any real difference to this cake, and it used so much sugar that I figured I'd go with the cheaper option!

**I had actually intended to add 40g of cornflour, but ran out. I can't see it making any real difference though.

***I couldn't be bothered to grab a tablespoon. I don't know how much 20g of vanilla extract is, but I was aiming for about 2tbsp...

Method

  1. Cream the butter and sugar together in a stand mixer until fluffy.
  2. Add the dry ingredients (flour, cornflour, baking powder, salt) and mix until homogenous and breadcrumb-like.
  3. Drizzle the oil in gradually.
  4. Beat the eggs and mix with the milk. Gradually add to the mixer.
  5. Gradually add the rum and vanilla.
  6. Pour into greased and floured cake pans.
  7. Bake at 180C for 20 minutes, then turn down to 160C for a further 25 minutes.
  8. Heat the sugar and water in pan, stirring to dissolve the sugar.
  9. Stir in the butter and remove from the heat.
  10. Stir in the rum and vanilla.
  11. Remove the cakes from the oven and turn out from the pans while still hot.
  12. Brush the syrup liberally over the cakes and allow to cool.

Ready for the oven! I only intended to use the super-cute bee silicone cake tin on the right - clearly, I didn't scale the quantities down nearly enough. I think 2/3rds of the quantities I actually used would have been just about perfect 

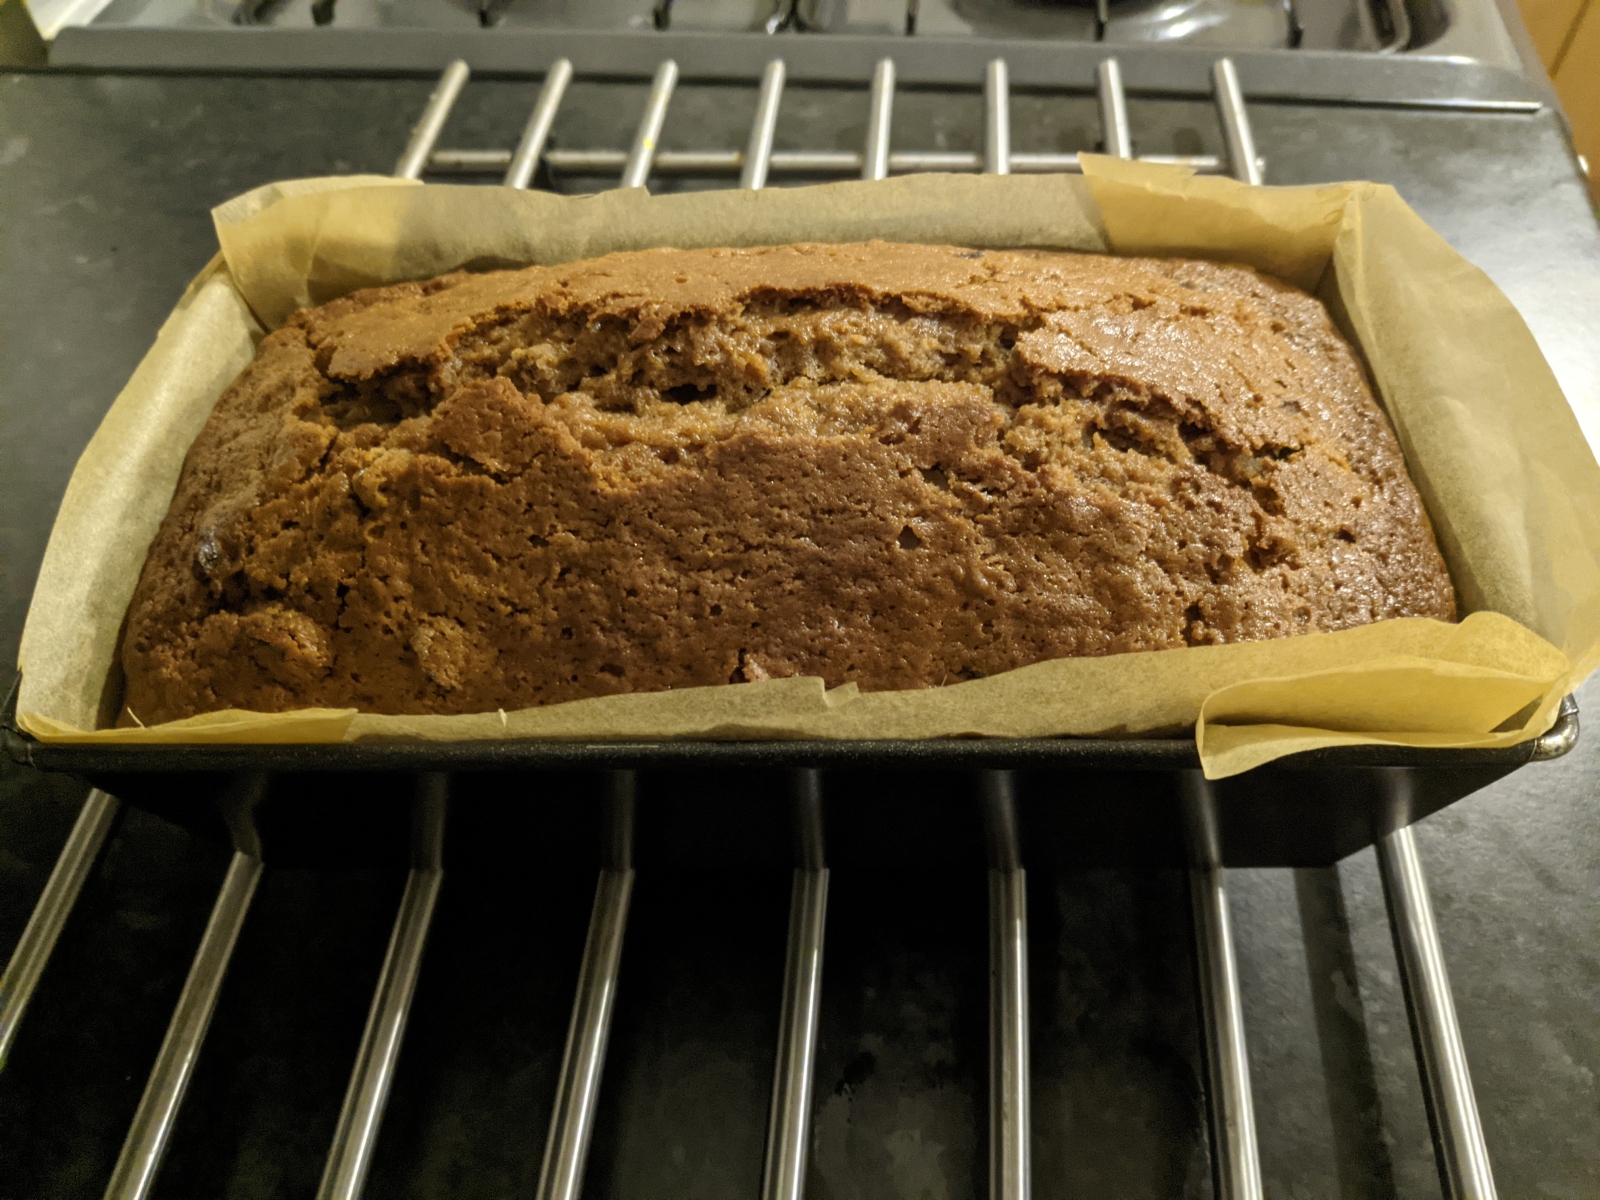
And here they are out of the oven. I had thought this might be the case before I put them in to bake, but I think it's pretty clear that I used too much baking powder


Almost got it out of the tin intact! Maybe I can claim that this was intentional because it wouldn't fit on the plate otherwise, and after all, you always need a small mini cake to test, right?


Holy heck that syrup is boozy. This is definitely a cake that you mustn't eat before you drive...

Even having got the quantities so badly wrong, there is faaar too much syrup for the quantity of cake. And the ridiculous thing is, I'm pretty sure that I downscaled the syrup:cake ratio already. I did end up using all of it, but that's more because of my stubbornness - I'm guessing the cakes are verging on completely saturated.

Edit: I've completely changed my mind, having now finished eating it. There's absolutely not excessive amounts of syrup - perhaps it could even have done with a bit more. I'd forgotten that rum cakes are supposed to be soaked in the syrup - it's not a glaze. This cake was great though - and it got significantly better after aging for a couple of days. Definitely a special occasion cake, given the amount of rum and butter in it, but this was a definite winner!